Goan Fish Curry (paleo, gluten free, & dairy free)

Goan Fish Curry

Along the Arabian Sea, to the South of Maharashtra, you’ll find India’s smallest state; Goa.  Goa is a tropical paradise known for its variety of fish and rich cuisine.  There is an abundance of coconut trees in Goa, so coconuts and coconut oil are used in many dishes along with an array of spices.

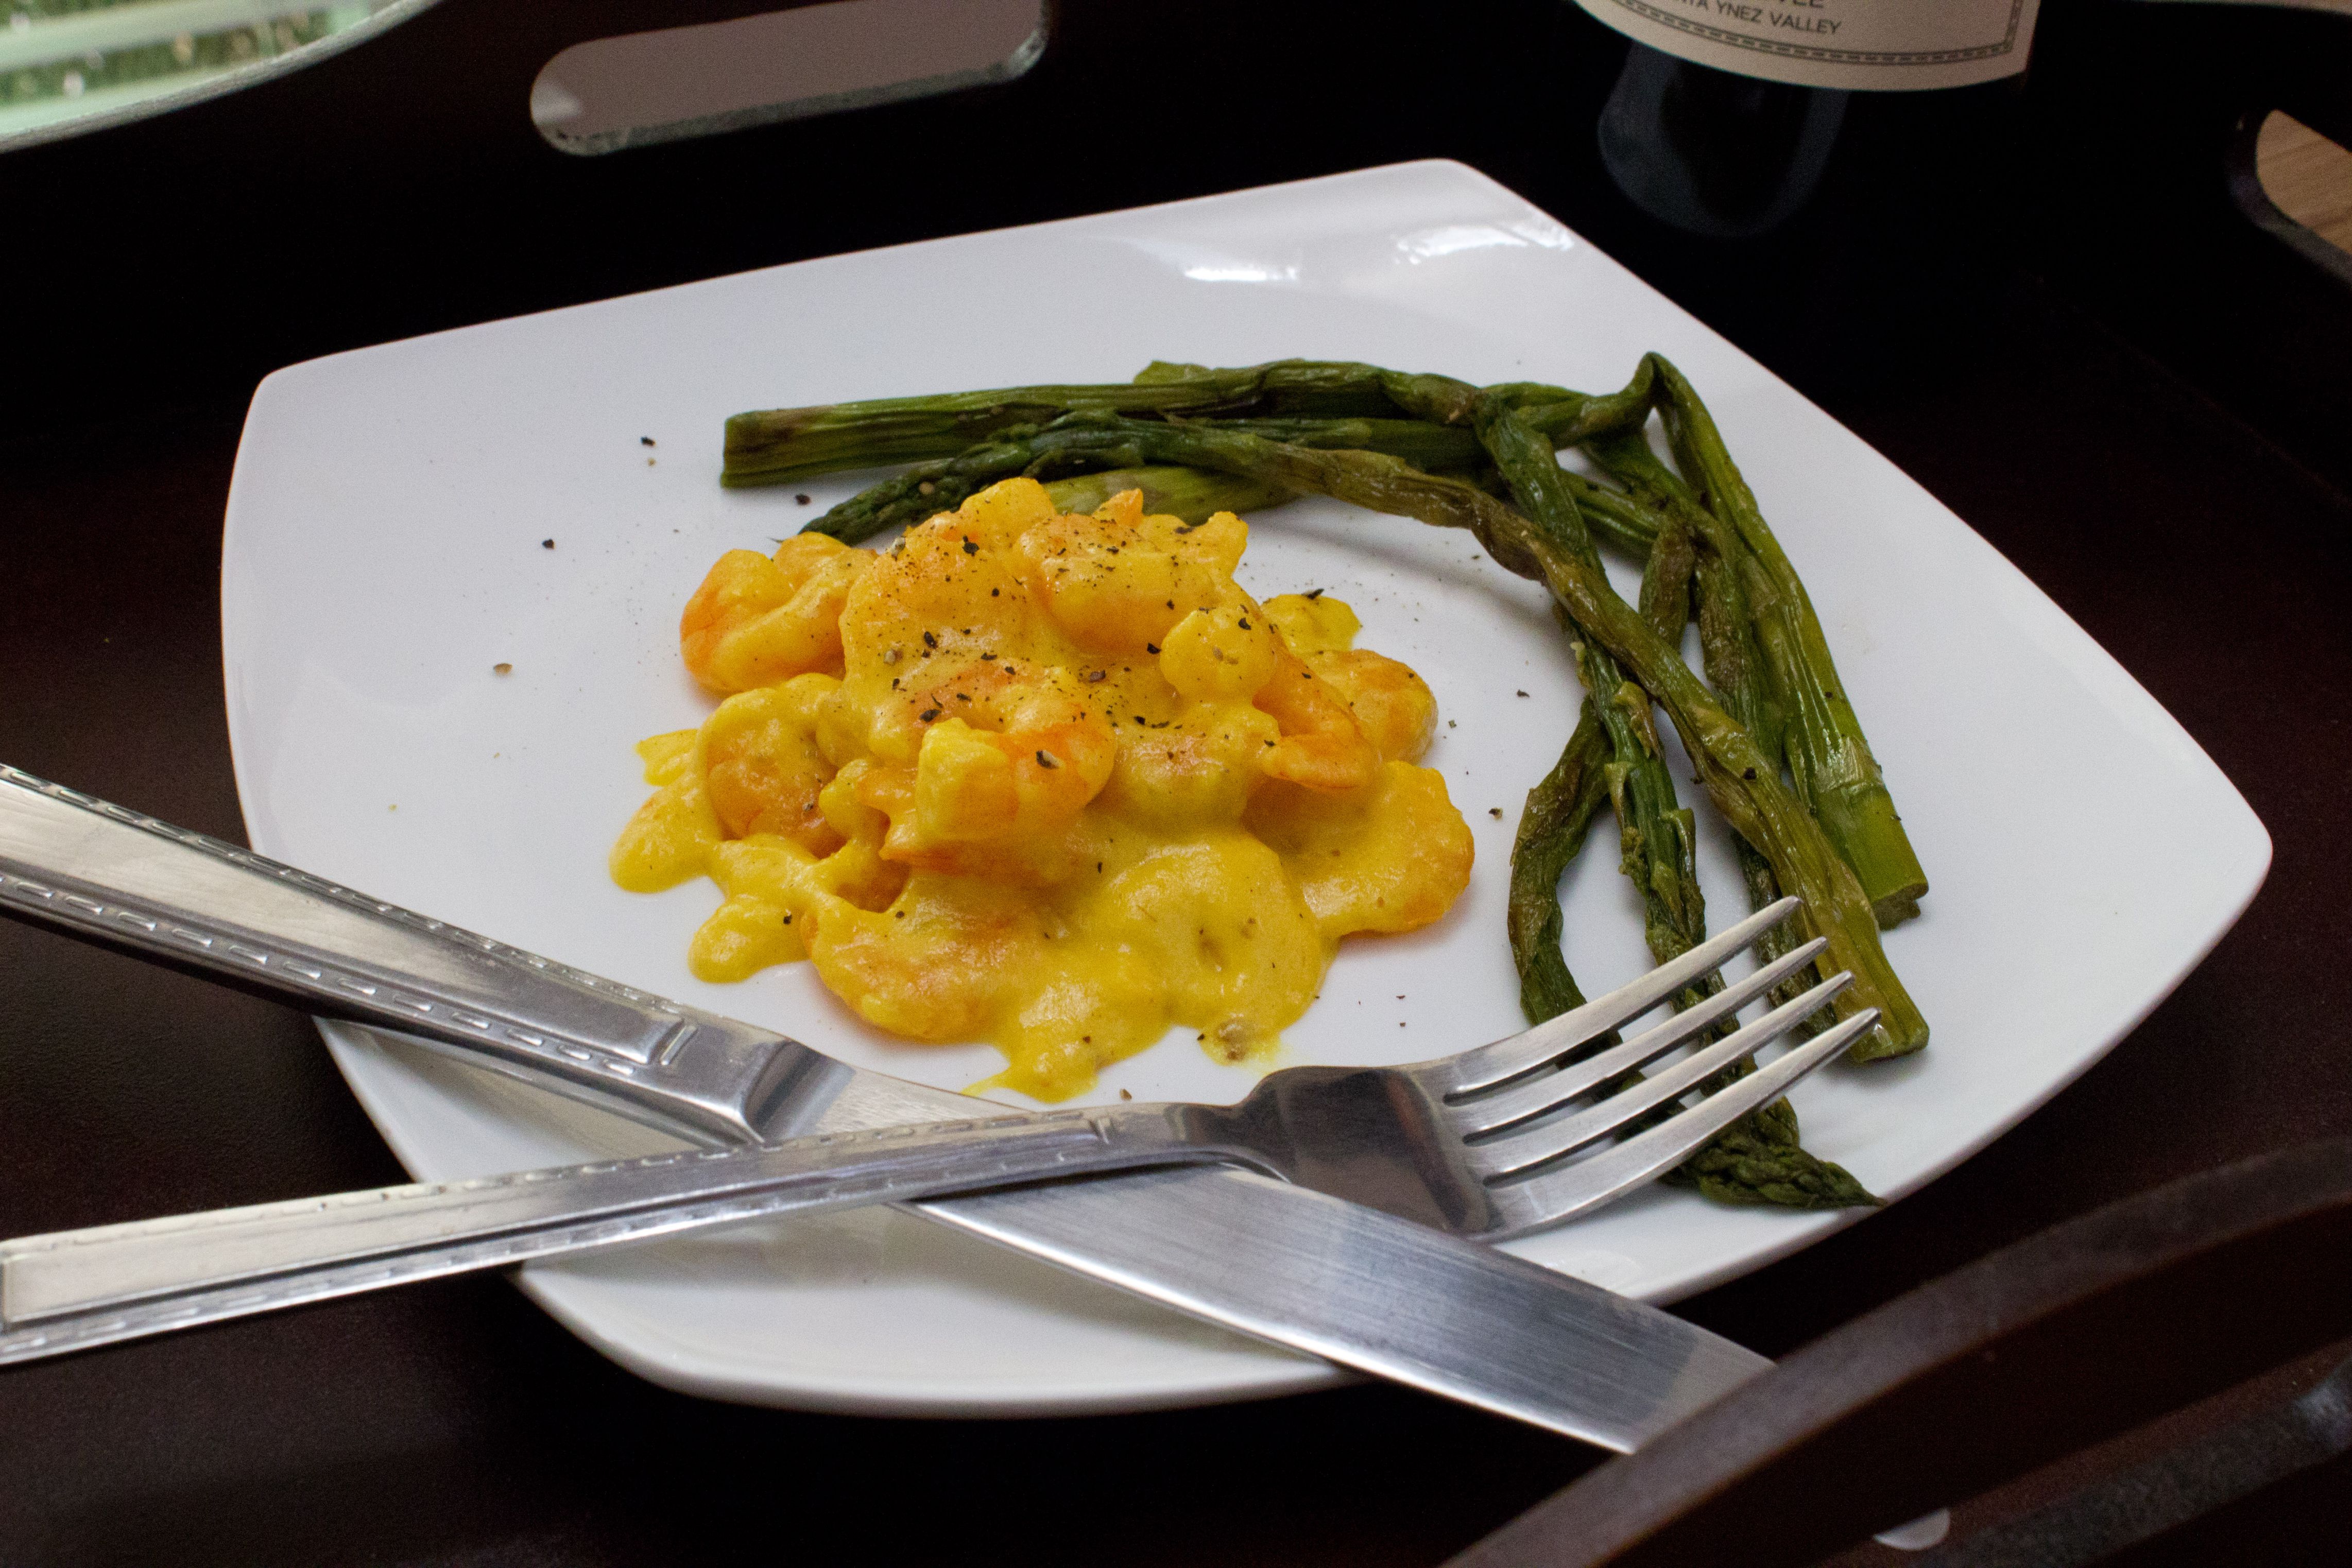
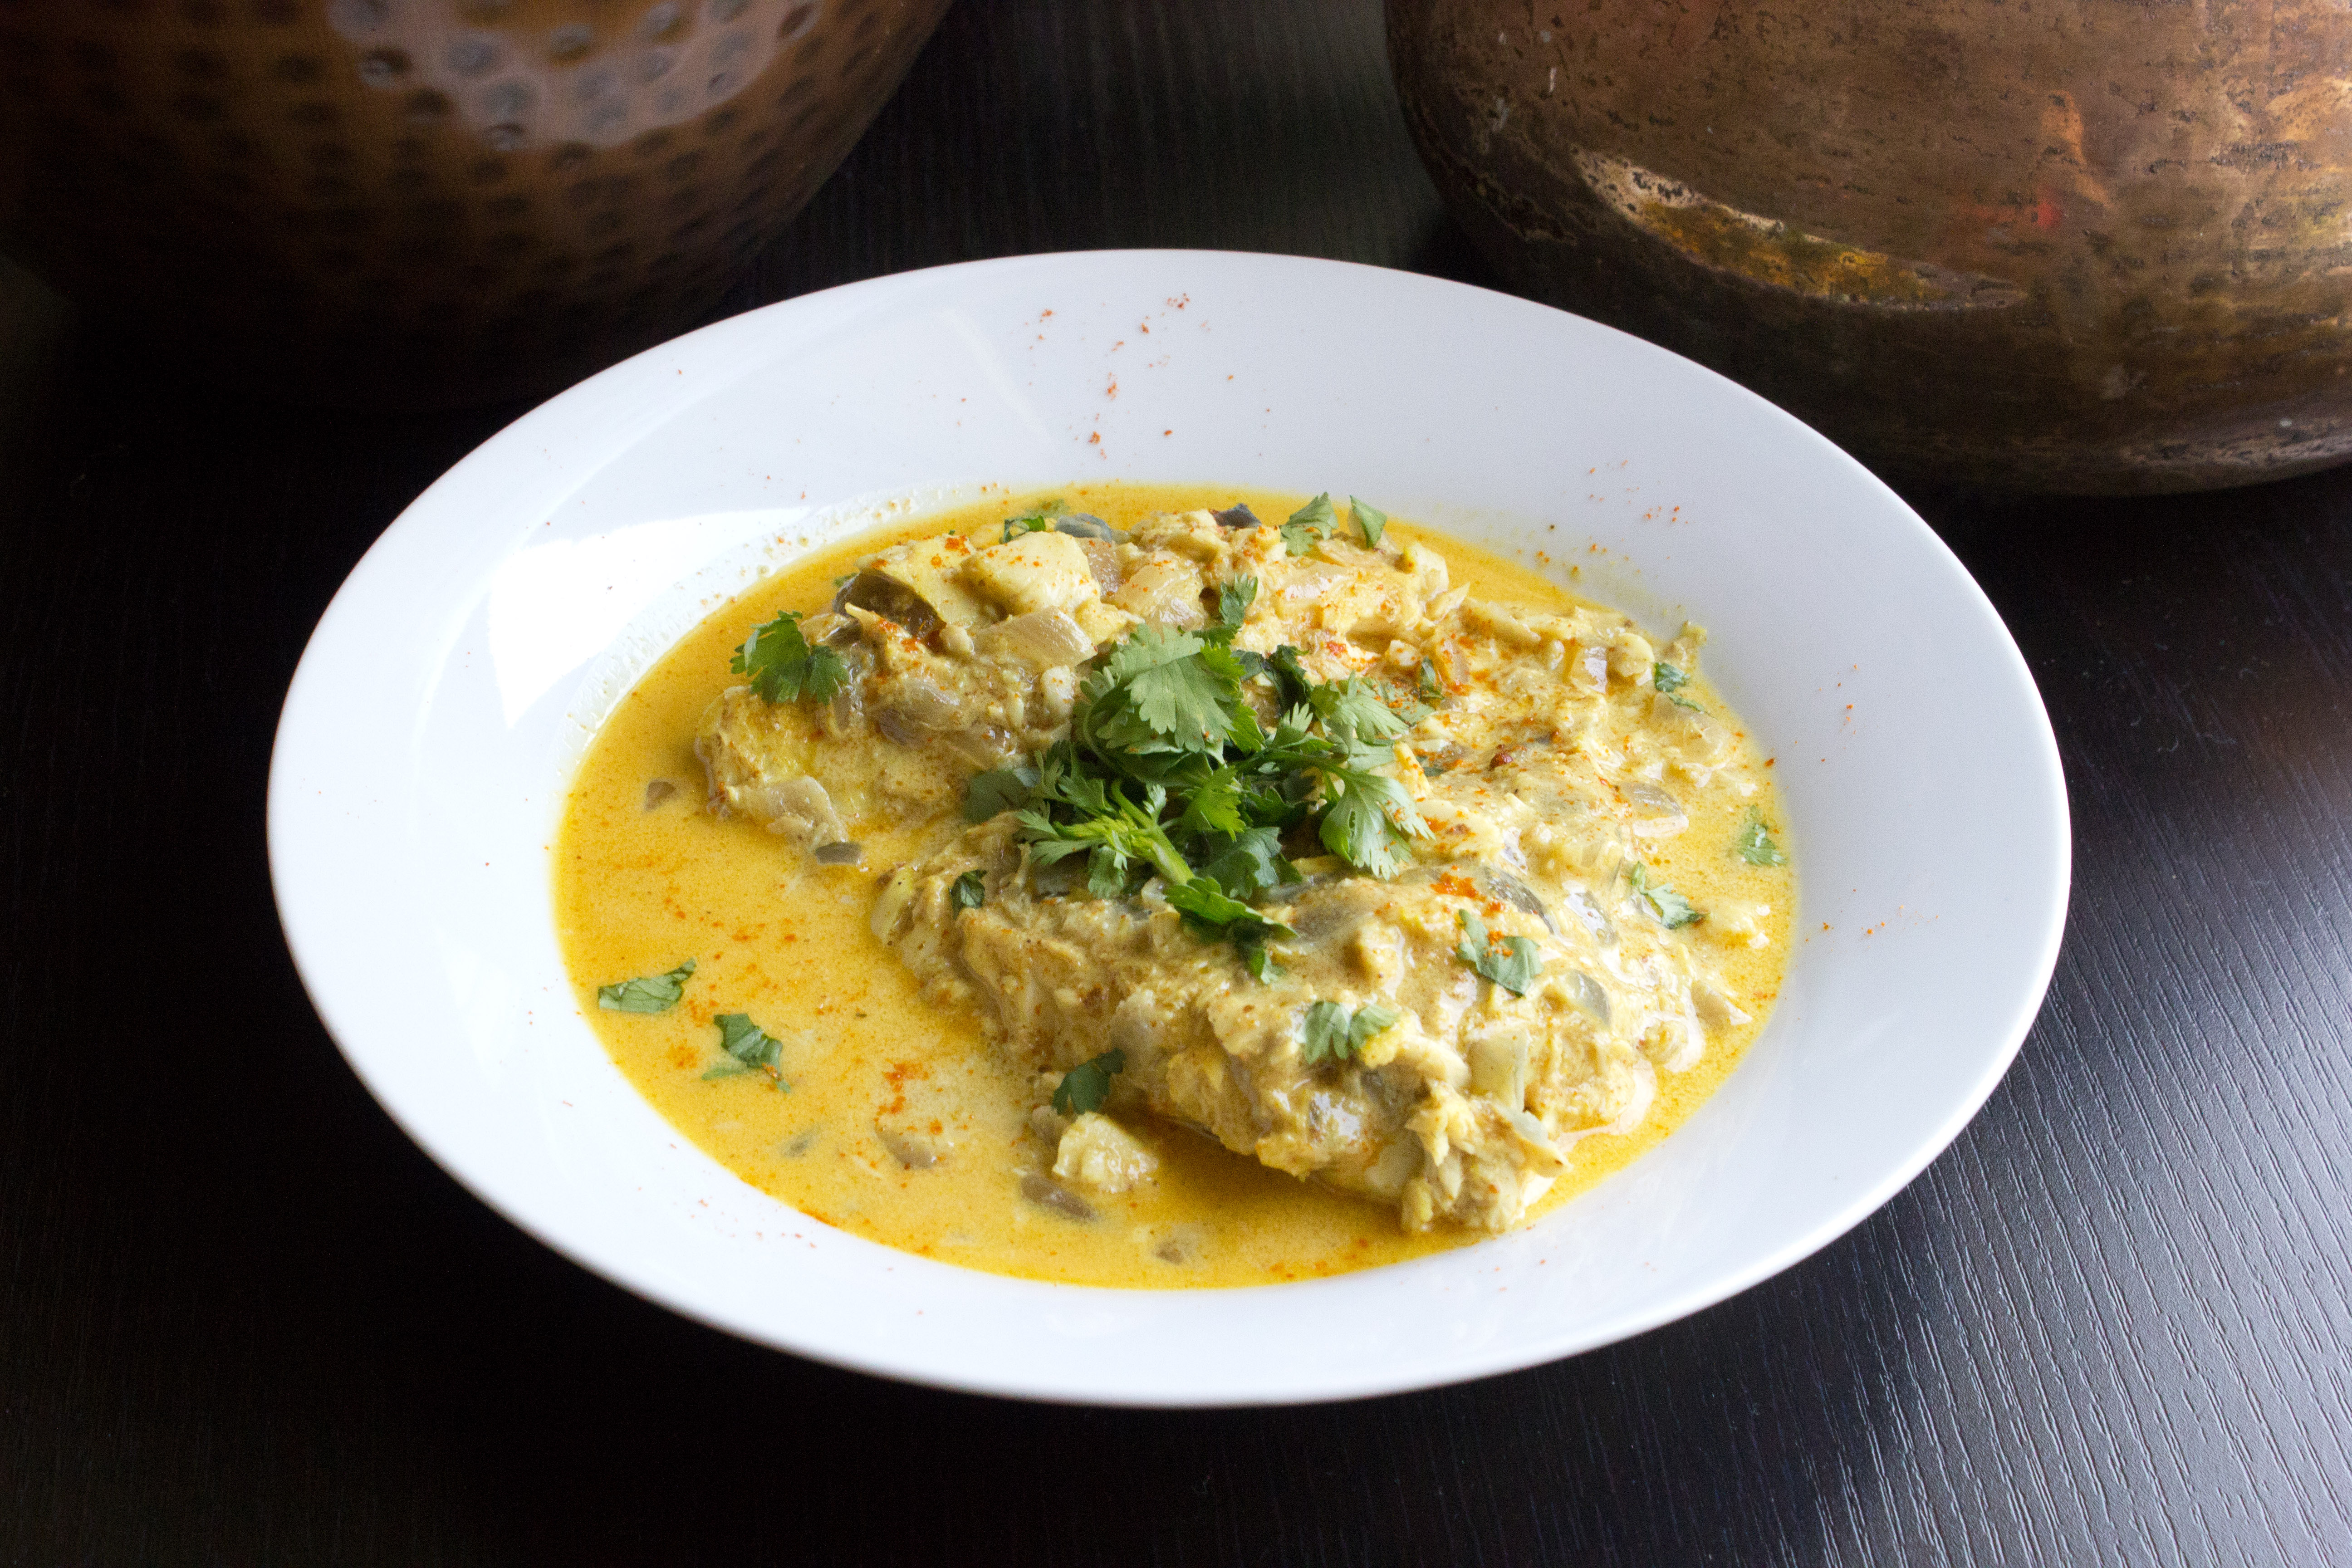
I have yet to visit this wonderful place, but I adore fish curry and Goa is famous for theirs!   Goan fish curry is usually served on rice, and there are two kinds.  One type of fish curry has a tomato base and the other is made with coconut cream.  I haven’t been eating much rice lately, so I wanted something I could have almost as a stew.  Coconut cream sounded just dreamy, so I thought I’d give it a shot!

I decided to go with a milder fish so it would take on the flavor of all the spices a little better.  Some Asian super markets carry fish of the Indian variety, but I picked up some Tillapia from Wholefoods this time.  I Had to keep tasting it to make sure I had all the flavors right, since I had never made Goan fish curry before.  Thankfully my in-laws were there to help judge the taste!  After some constructive criticism and some added ingredients, it was approved!

The most challenging part of Indian cooking for me has always been perfectly balancing the flavors.  Some dishes require 8 or more different spices, and with so much happening in a dish it can be a struggle to keep one flavor from overpowering the others.  Over the years I’ve gotten the hang of it, but it took some serious trial and error!  Especially since when I first started making Indian food, I had no idea what some recipes were supposed to turn out like.  Now I can honestly say that this is a well balanced, packed with amazing spices, rich Goan fish curry!


Ingredients

Serves 4

4 Tilapia fillets

2 tsp turmeric powder

1 onion, diced

3 cloves garlic, crushed

1/4 tsp grated fresh ginger

1/4 tsp mustard seeds

2 tsp garam masala

1 tsp cumin powder

1 tsp cayenne powder

1 1/2 tsp vinegar

1 1/2 cups coconut cream

1/2 cup water

sea salt to taste

cooking oil


Method

Rinse the Tilapia and pat dry with a paper towel to remove moisture.  Then rub the Tilapia with the turmeric powder and refrigerate for about 15 minutes.

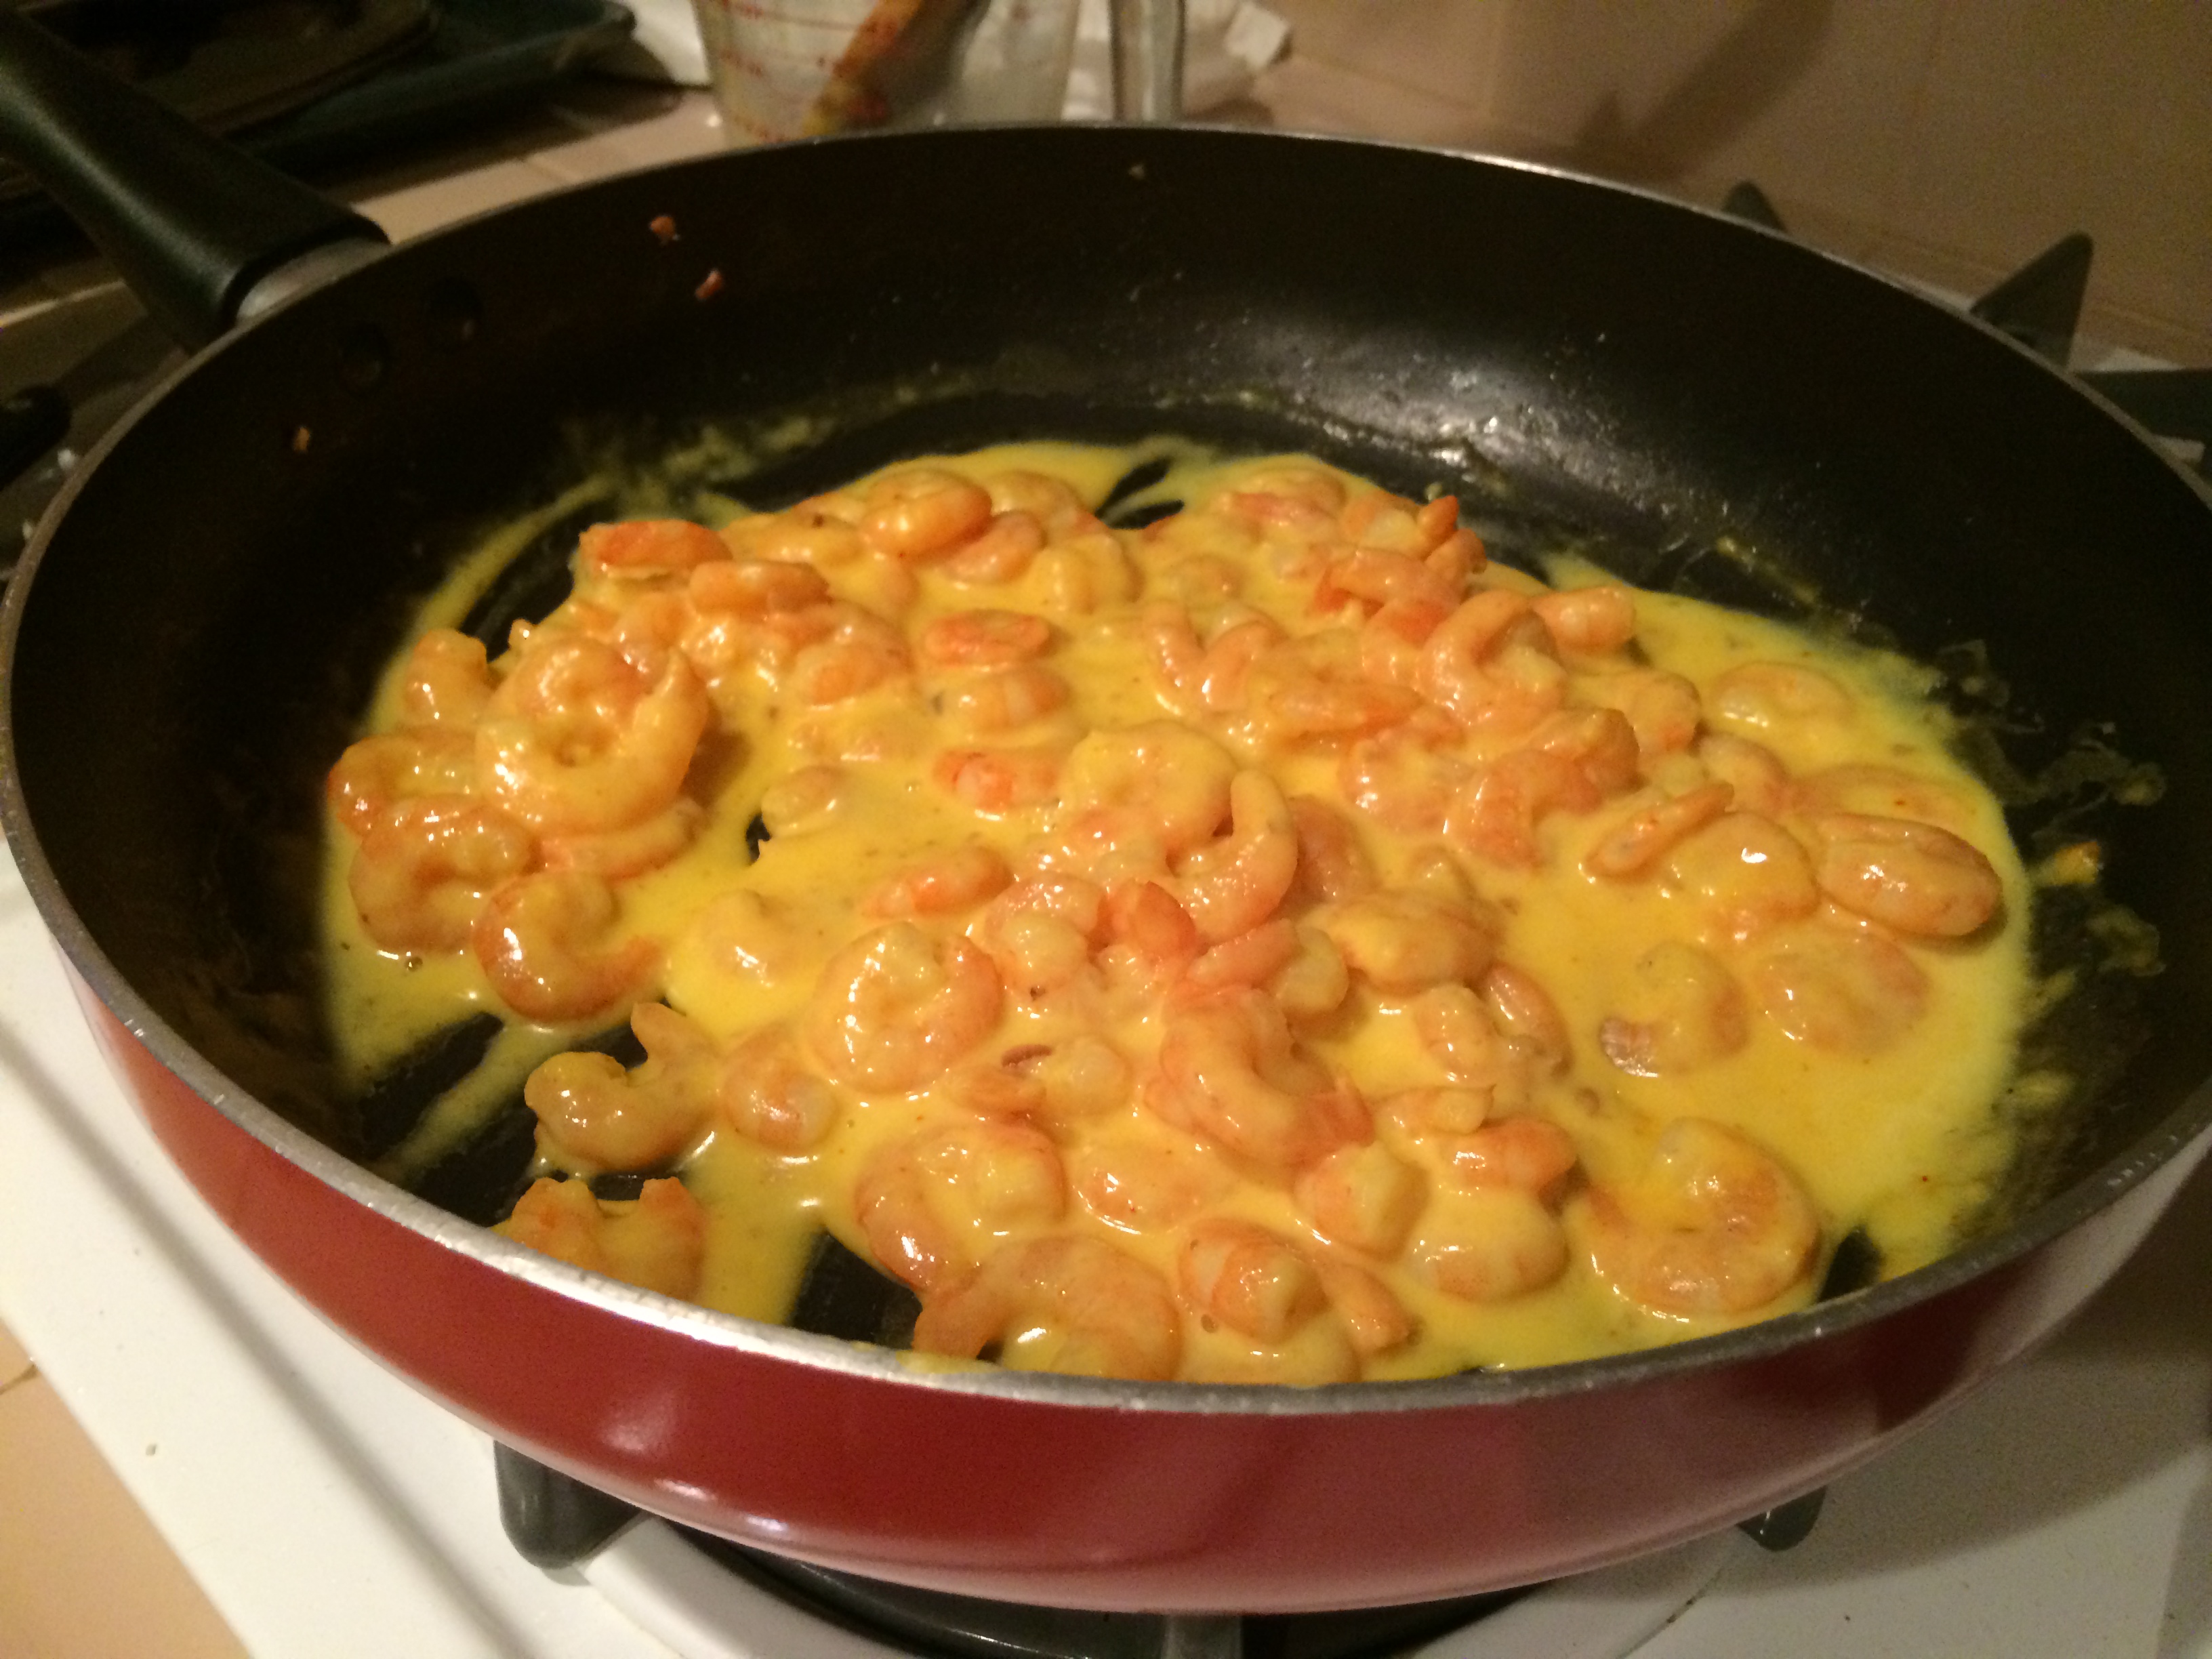
While the fish is in the fridge, you can prep the curry.  Heat  about 1 tsp oil in a large saucepan at medium/high heat.  Add the garlic and onions and saute until they start to brown.  Next throw in the ginger, mustard seeds, garam masala, cumin, and cayenne.  Stir well and reduce to low heat to let the flavors get to know each other for 3 to 4 minutes, stirring occasionally.  Add the coconut cream, water, vinegar and salt to taste.  Stir and let the curry simmer for about 10 minutes.  If your saucepan has a lid, you can place the lid on the pan while it simmers.

While the curry is sitting on low heat, heat 1/2 Tbs oil in a large pan on medium heat.  Usually the fish in Goan fish curry is deep fried.  I wanted to cut the oil, so this fish is lightly fried.  Add the fish to the pan and fry for about 4 minutes on each side or until each side is cooked.  Remove from heat and add the fish to the curry in the saucepan.  Cook for an additional 15 minutes and serve over rice, quinoa, or serve it in a bowl like a soup.  That’s how I had mine and it tasted like paradise to me!


Continue Reading

Zucchini Pancakes with Piri Piri Aoli (paleo & gluten free)


Zucchini Pancakes
Zucchini Pancakes

Back when we were dating, the hubby came back from a trip to London raving about Piri Piri sauce. Pronounced Pee-ree Pee-ree, it is actually the African bird’s eye pepper. It was used by Portuguese settlers who found it while exploring in Mozambique and fell in love with it as we have.  A few ethnic markets near us started carrying Piri Piri hot sauce from time to time and we would stock up whenever we saw it.  Once I tasted it, I realized what all the hullabaloo was about!  The flavor in that stuff is off the charts!  It is not your typical hot sauce.  Now I pour it on eggs, veggies, and everything in between.

I met some friends for brunch this past weekend and somehow Piri Piri sauce came up.  We were talking about all the things you could do with it.  I don’t know why we were talking about food while stuffing our faces, but I feel like I’m always talking about food! When I got home I remembered that I had picked up a bottle of Piri Piri spice blend from the Savory Spice Shop in San Diego.  I believe you can order online from them as well.  I also had a ton of zucchini in the fridge and was thinking I would make a frittata or maybe a crustless quiche this week.  Smaller versions of things always seem more appealing, so I decided on zucchini pancakes.

Now, how do I incorporate the Piri Piri spice and trick my husband into eating a whole lotta zucchini??  There’s a recipe for making hot sauce on the bottle but I wanted something creamy.  Plus, I already have a bottle of the hot sauce in the fridge.  Aoli sounded perfect!  A little mayo, a little olive oil, some of the Piri Piri Spice, and done.  My husband had seconds!  The kids opted for ketchup as the Piri Piri aoli has a little kick to it.  If you’re worried about too much heat, I would recommend adding half the amount of Piri Piri spice and then tasting it to see if you want to add more or not.


Ingredients

Zucchini Pancakes

2 eggs

1 lb zucchini, grated

1/2 cup almond flour

3 Tbs amaranth flour

1 clove garlic, crushed

1/2 tsp sea salt

1/4 tsp ground pepper

Cooking oil


For the Piri Piri Aoli

3 Tbs mayo

2 Tbs olive oil

1 tsp Piri Piri seasoning


Zucchini Pancakes 03

Method

Pat the grated zucchini down with a paper towel, or two in needed to help reduce moisture.  In a medium sized mixing bowl, beat the eggs then add the remaining ingredients for the zucchini pancakes.  Blend together with a fork until combined.  Heat about one tsp oil in a large frying pan on medium/high heat.  With a large eating spoon, place a scoop in the pan and flatten the zucchini with the spoon if needed so it takes on more of a round shape.  Repeat until the pan is full, leaving a little space between each pancake.  Cook until both sides are browned, around 2 to 3 minutes per side.  Remove from pan and repeat until all the mixture has been made.

Zucchini Pancakes 04

In a small bowl, mix the ingredients for the aoli together.  Mix it well, and pour right on top of your zucchini pancakes or on the side.  If there is any aoli leftover, it keeps well and tastes great on everything.  I put some on my eggs and toast today!


Continue Reading

Stuffed Bell Peppers (vegan, paleo, & gluten free)

Stuffed Bell Peppers 03

I was doing a sort of cleanse a couple weeks ago and there were no carbs allowed for a week.  Yup, a whole week!  It was strictly protein and veggies.  Now I know this is normal for many, but not for me.  I don’t eat much bread or rice, but I NEED my fruit!

We don’t eat meat in our house on Monday, and usually I make lentils or something involving rice or pasta.  I noticed that one of the meal suggestions for the week was stuffed peppers with ground beef.  I was a vegetarian years ago and with being gluten intolerant you get very used to removing certain ingredients from recipes.  You know, burger with no bun, wrap with no tortilla, substituting flours, etc.  The list goes on and on.

I tried to pack quite a few veggies in there and they came out tasting really good!  So I made them again last night for Monday night dinner.  They can be topped with a little dairy or vegan cheese if you like.  For all the carnivores out there, sausage, ground beef, or ground turkey would make a tasty addition!  If you use a seasoned sausage like Italian or something, just leave out the oregano and basil, and add less salt.


Ingredients

1 onion, diced

4 cloves garlic, crushed

6 bell peppers, any color

1 eggplant, diced

1 zucchini, diced

4 oz mushrooms, diced

14.5 oz can organic diced tomatoes

3 Tbs tomato paste

2 tsp dried oregano

1 tsp dried basil

salt and pepper to taste


Method

In a large skillet, saute the chopped onion and garlic until onions are translucent.  Add in the rest of the veggies, the diced tomatoes, tomato paste, and spices.  Simmer for 15 minutes then remove from heat.

Preheat the oven to 350* F.  Cut the tops off of the bell peppers and clean out the seeds.  Fill the peppers and pack them full.  Place the tops back on each one and put toothpick through opposite sides on top of the pepper. This will help keep the tops of the peppers on while they’re in the oven.

Place peppers in an oven safe dish and bake for 30 to 40 min.  Let cool for a few minutes since they’ll be piping hot and dig in!

Stuffed Bell Peppers 01

Stuffed Bell Peppers


Continue Reading

Chocolate Cake

Gluten Free Chocolate Cake 02

I have been making birthday cakes for everyone in the family for years.  Mostly because they feel guilty if I can’t eat it!  I really do enjoy it though.  It’s therapeutic in a way.  At first I would decorate the cakes with good old fashioned frosting, but then you see all of these gorgeous fondant cakes and my artwork didn’t seem so appealing anymore.

When my younger daughter was about one year old I took a series of cake decorating classes.  I had all these bright eyed ideas about opening up a gluten free bakery and selling my pretty cakes and cupcakes.  A few events and many cake-pops later, I realized that being up all night baking was not something I wanted to do full time.  It is a lot of work for one person, and at the time it just didn’t make sense for me.

That being said, the only time you’ll find me up to my elbows in fondant nowadays is for my daughters’ birthdays or if someone puts in a special request.  This weekend I’m making a cake for an old friend’s baby shower.  She’s basically family and she is on a gluten free diet.  I gladly accepted her request for chocolate cake, but wanted to play with a new recipe.  Who can say no to a pregnant lady who hasn’t had good cake in forever?! That should fall under cruel and unusual punishment if you ask me.

For any other cake, I would use my flourless chocolate cake recipe, but it’s not the best in a layer cake.  The recipe below however is perfect for a layer cake!  Crumbly and moist, not too sweet with just the right amount of chocolate.  I made one 8 inch cake and a tray of mini cupcakes just to test it out and both were great!  I also tried a recipe for stabilized whipped cream that I found on Pinterest.  The result of both put together was these fancy mini cakes.  Absolutely delish!

The little mama to be was thrilled with how the final cake turned out and the fact that she got to eat it too!  The theme of the baby shower was blue elephants carrying an umbrella, and the host and I decided that there should be one on the cake.  The little elephant is my favorite part and the cake was not only adorable on the outside, but I am happy to say that the cake on the inside received rave reviews!  I’ve included a picture of the cake at the end of this post, so you can see what I’m talking about.  The smaller cake on top was made with the Funfetti Cupcake recipe from Minimalist Baker (minus the sprinkles) and filled with strawberries and whipped cream.  The larger cake was my gluten free chocolate cake recipe with raspberry cream cheese filling.  Well fondant, I bid you adieu until our next adventure!


Gluten Free Chocolate Cake


Ingredients

1 2/3 cups all purpose GF flour (Cup4Cup worked nicely)

1 cup unsweetened cocoa powder

1 cup lightly packed organic brown sugar

1/4 cup organic cane sugar

1 tsp baking powder

1 tsp baking soda

3/4 tsp xanthum gum

1/2 tsp salt

1 cup hot water

3/4 cup vegetable oil

1/2 cup light sour cream

3 eggs


Method

Grease two 8 inch cake pans and line with parchment paper.  Grease the parchment paper as well.  Preheat oven to 325* F.

In a large mixing bowl, whisk together the dry ingredients.  In a small mixing bowl, whisk the eggs and then add the sour cream.  Mix the sour cream and eggs together until nicely blended.  Add the hot water and oil to the dry mixture and blend fold together with a rubber spatula.

Add the egg and sour cream mixture into the large mixing bowl and whisk together by hand until just combined.  No need to bust out the Kitchenaid this time!  Pour into prepared cake or cupcake pans and bake until your toothpick comes out clear.  That’s about 35 minutes for an 8 inch cake.  Top with your favorite frosting or have a nice slice with some coffee as is.  They freeze well too if you want to save some for later!


Baby Shower Elephant Cake copy


Continue Reading

Mint & Cucumber Yogurt Dip

Cucumber Mint Yogurt

A blend of dried mint, cucumbers, fresh garlic, and yogurt makes this dip a great companion to anything from crackers to kabob.  I usually just dip my veggies in it.  So good!

There is a popular Persian side dish that is very similar in flavor.  I’ve changed it up a bit by using lebni instead of yogurt.  Lebni is a very thick Arabic style yogurt.  Greek yogurt can be used as well, but lebni is even thicker and creamier than greek yogurt.  I know, it’s hard to believe that such a thing exists!  It’s delicious on it’s own and what doesn’t taste better with a little garlic?

I make this recipe quite a bit for entertaining because the flavor is so refreshing, and I always get asked for the recipe.  You won’t believe how simple it is!  It can be made ahead or not.  Whatever works for you.  On this particular afternoon, I made a bowl as a side to the chicken kabob we grilled up.


Ingredients

1 lb lebni or greek yogurt

3 persian cucumbers, peeled and diced

1 1/2 Tbs dried mint

1 clove garlic, crushed

salt and pepper to taste


Method

Pat the diced cucumbers with a paper towel to remove any moisture.  This is an old trick my mom uses so that the yogurt doesn’t get too watery.  Place all of the ingredients, in order from top to bottom in a small mixing bowl. Mix together and there you have it, a perfect Mint & Cucumber Yogurt Dip!

Cucumber Mint Yogurt

Continue Reading

Sun-Dried Tomato Chicken Sausage and Spinach Pasta

Sun-Dried Tomato Sausage and Spinach Pasta 01

Long ago in the suburbs of Los Angeles, there was a girl who thought she would never again eat a deliciously comforting bowl of pasta.  Well, that girl was wrong!  For years later the magical elves of the cooking world created gluten free pasta that tasted wonderfully magnificent.

Seriously though, I would dream of pasta!  I went without for a few years so I don’t crave it as often, but my kids ask for pasta at least once a week.  Pasta is just so versatile.  Add sauce or just do olive oil; only add veggies or add meat too.  It can be thrown together rather quickly, which is great for weeknights.

Chicken sausage is also one of the items that is always on my grocery list.  I try to keep at least two kinds on hand at all times.  It works for breakfast, lunch, and dinner and can be added to almost anything.  I prefer the organic brands like Applegate Farms or Aidells, but that is purely a matter of preference.  In this recipe I used the Aidells Sun-Dried Tomato Sausage.  There are other brands that make a sun-dried tomato sausage as well.  I have bought the Trader Joe’s one many times before and it always tastes great!


Ingredients

1/2 of a 16oz package gluten free spaghetti, cooked and drained

2 1/2 Tbs extra virgin olive oil

2 cups chopped spinach

1 cup chopped fresh basil

1 clove garlic, diced

1 cup mini mozzarella balls, cut in half

1 tsp sea salt

pepper to taste

4 sun-dried tomato chicken sausages, sliced

1 tsp vegetable oil


Method

Once the spaghetti is cooked and drained, toss it with the olive oil so that it doesn’t get stuck together.  Put it in a medium sized pot and set aside for later.

Heat 1 tsp vegetable oil in a large pan over medium heat.  Add in the sliced sausage and cook until both sides are browned.  About 3 minutes on each side should do it once the pan is nice and hot.  Remove from heat.

Add the spinach, basil, garlic, sea salt, pepper, and the cooked sausage to the spaghetti and toss together.  Heat on low for 5 to 10 minutes until everything is heated.  Remove from heat, mix in the mozzarella, and serve.  If you add the mozzarella balls in earlier, they will melt!

Red chili flakes and Parmesan cheese also go really well with this.  Buon appetito!

Sun-dried tomato chicken sausage and spinach pasta 03


Continue Reading

Almond Cinnamon Bites (vegan, paleo, & gluten free)

Cinnamon Almond Bites
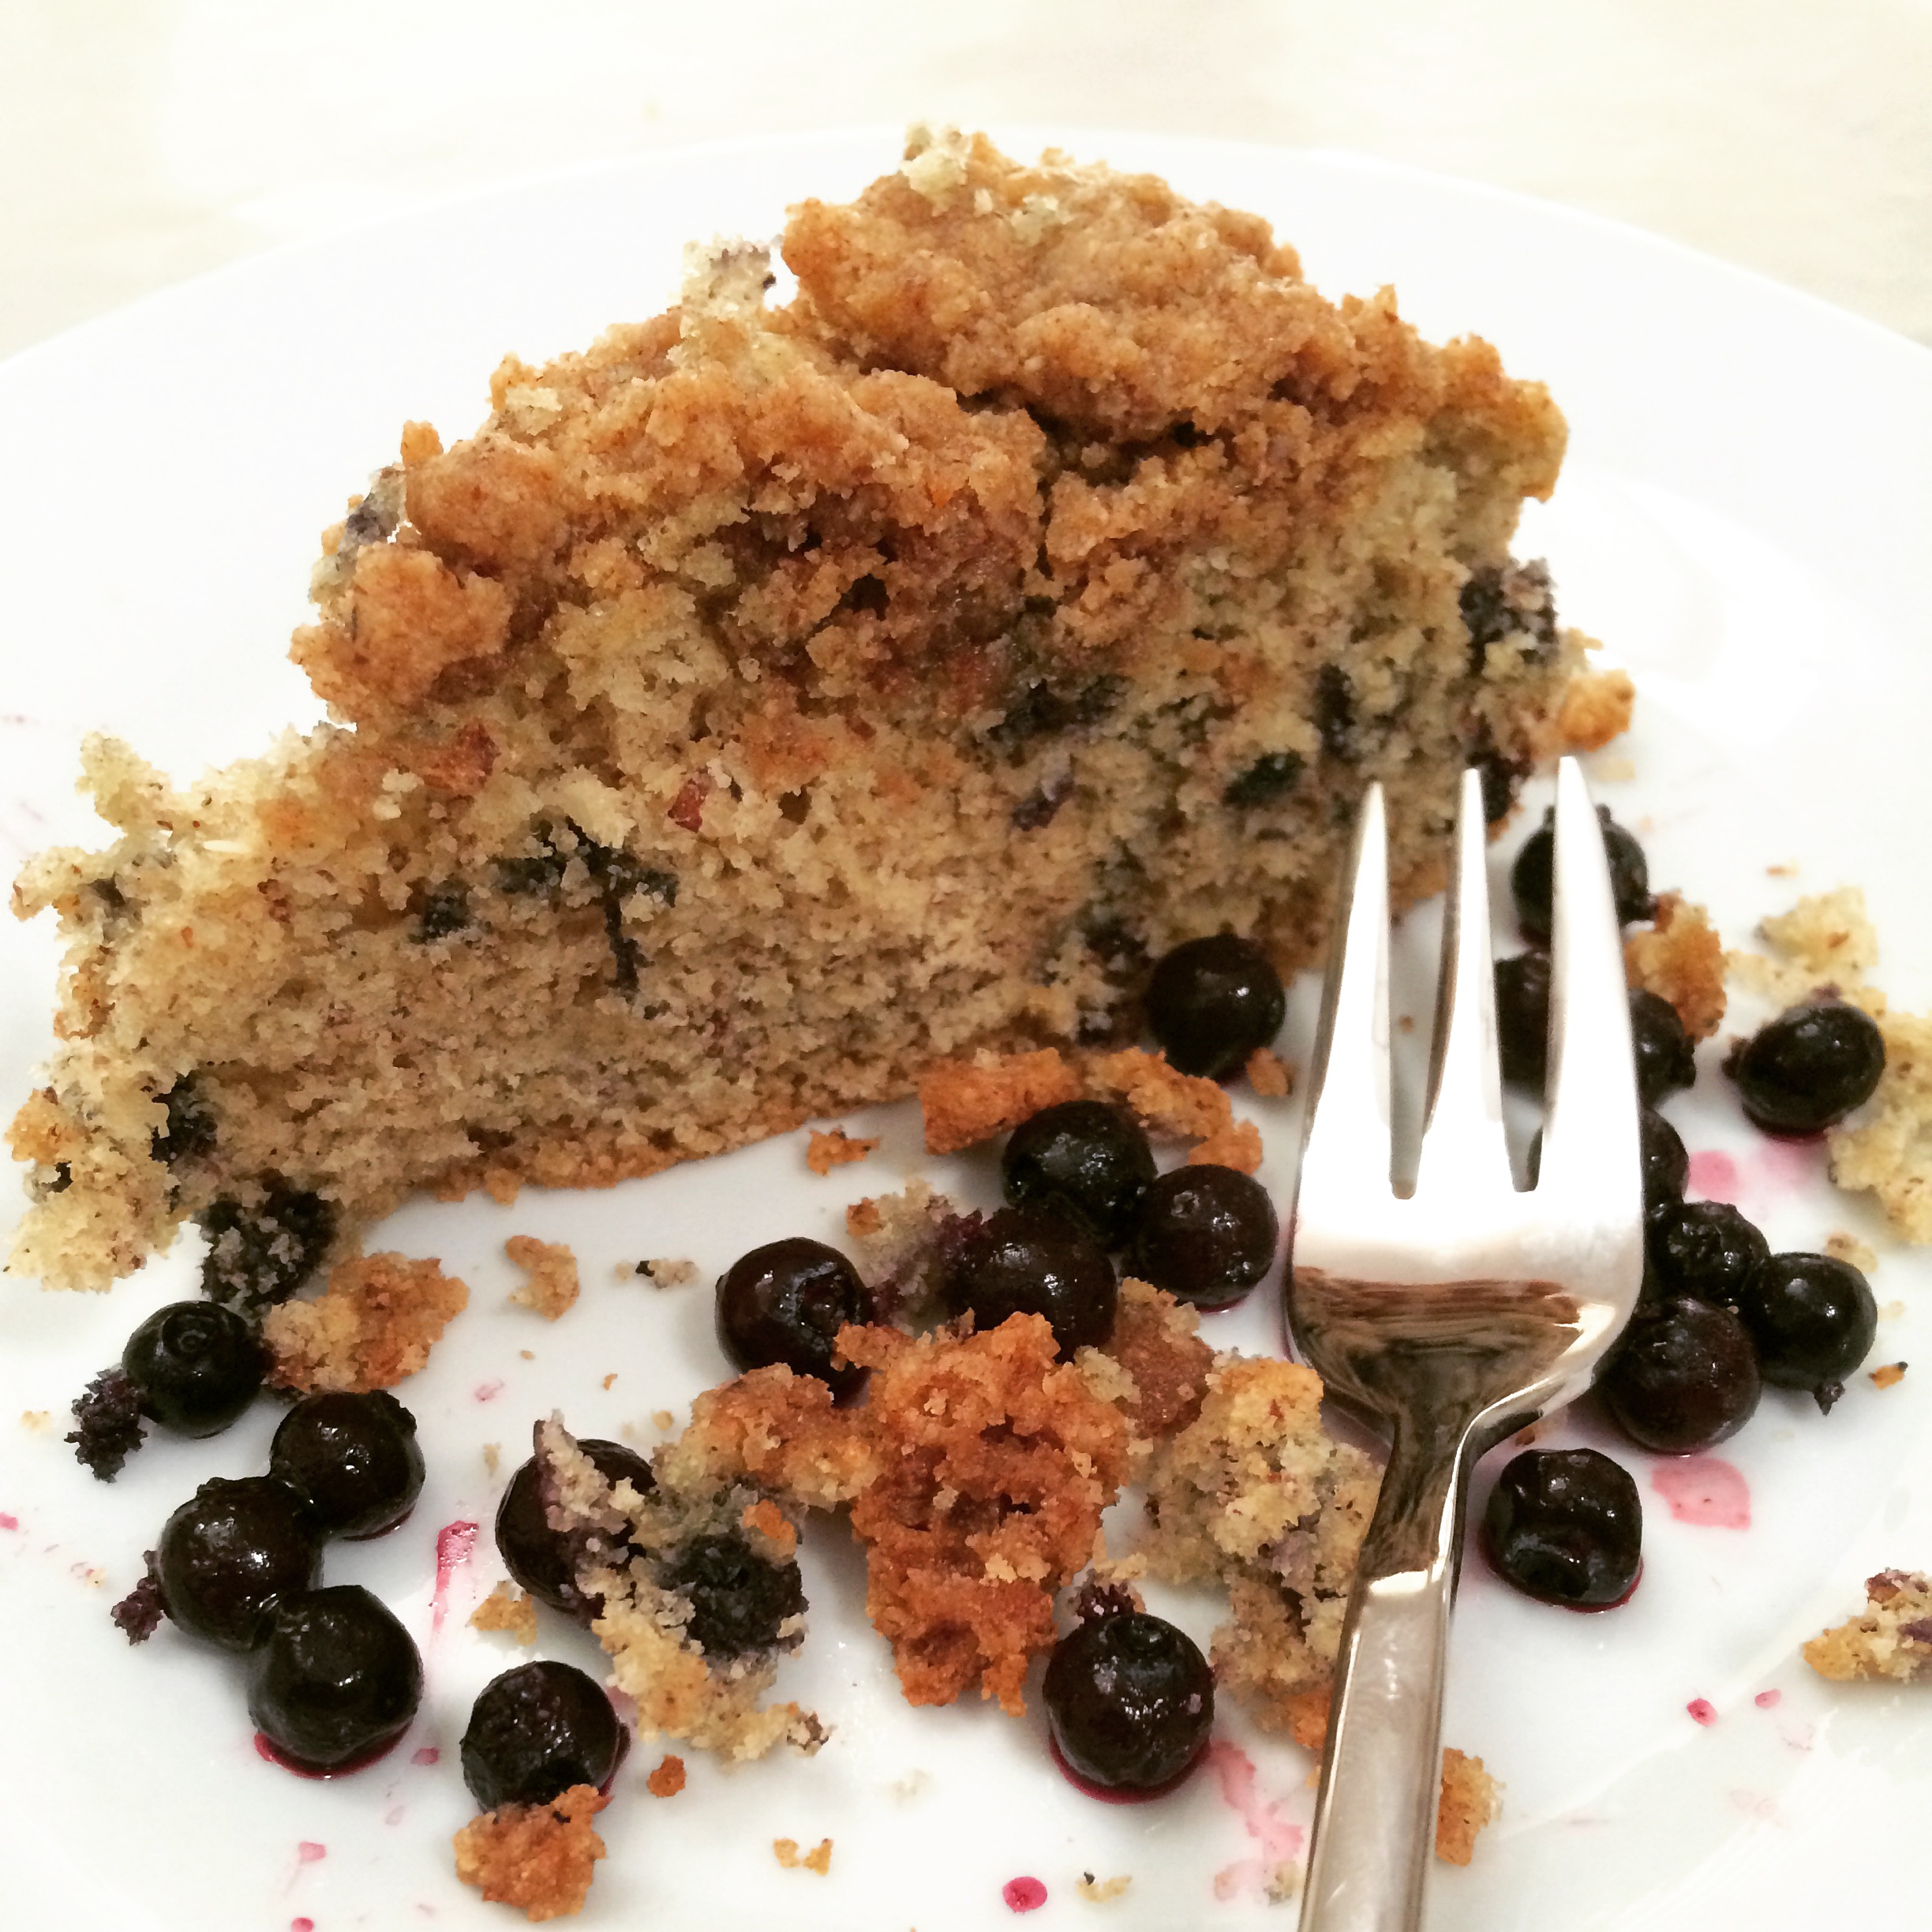
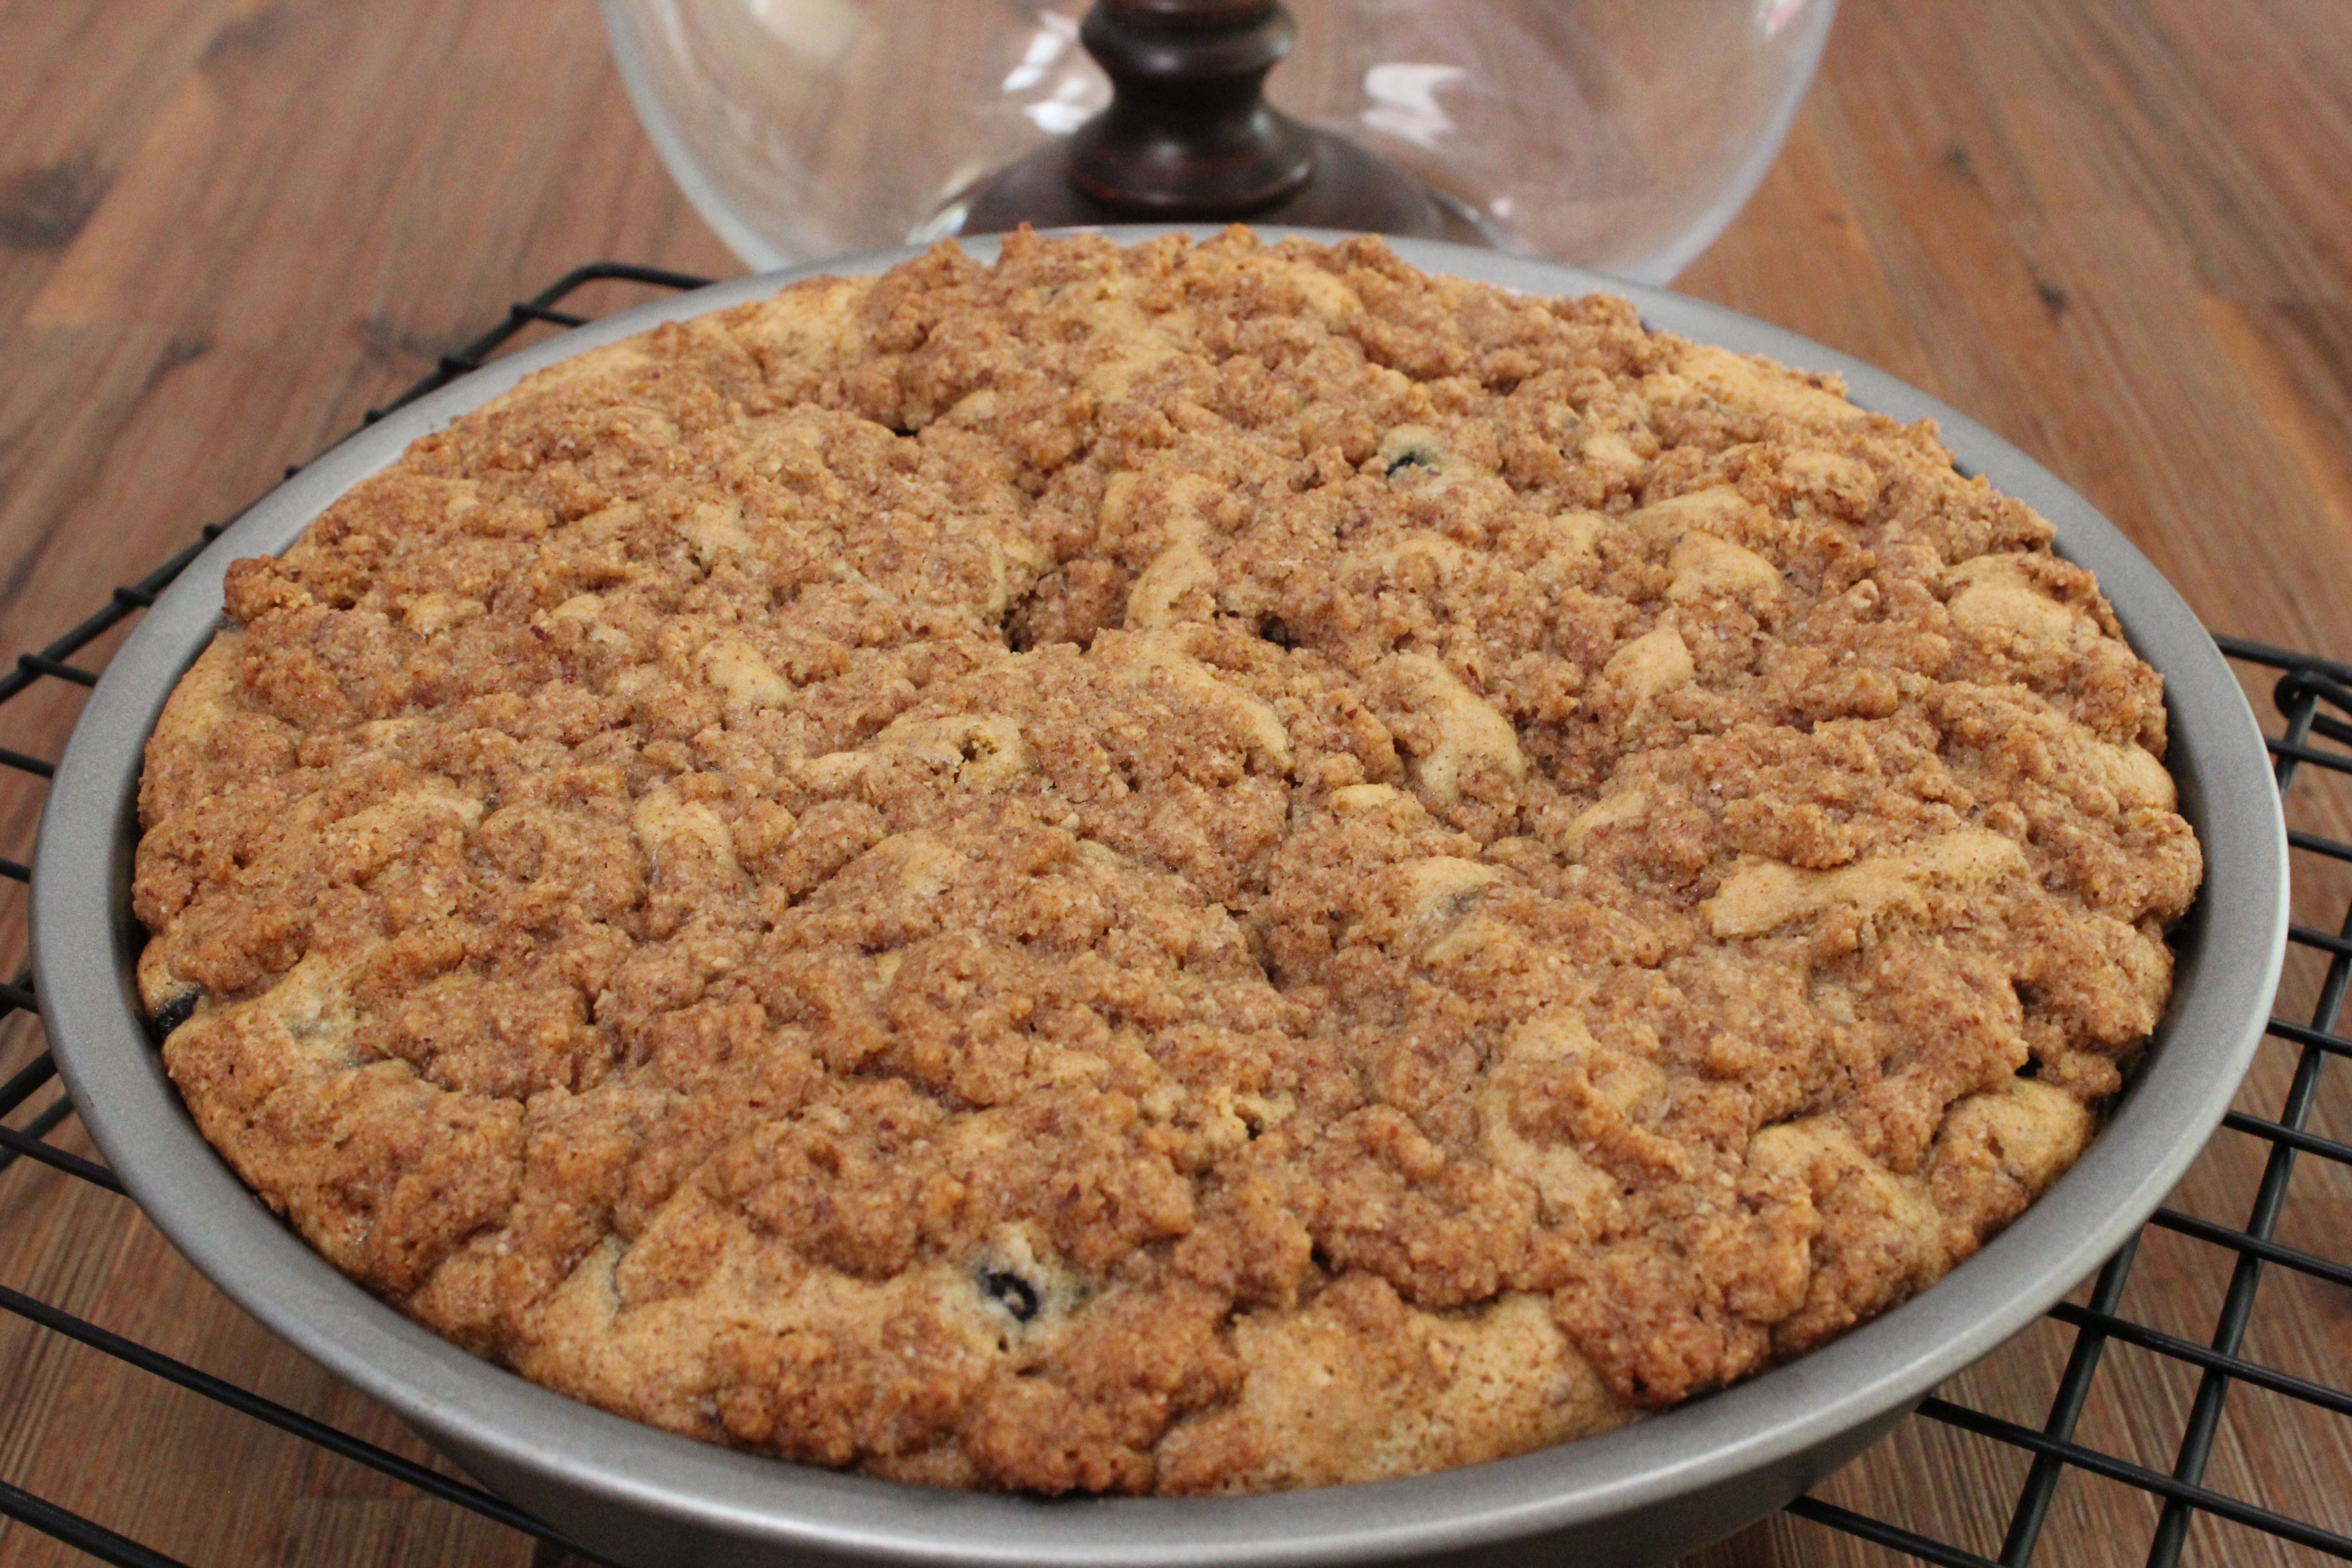
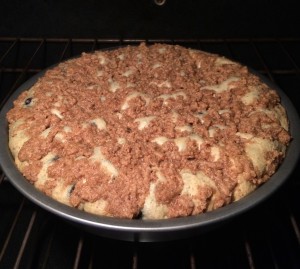
A couple of weeks ago I posted the recipe for a blueberry coffee cake.  When I made the cake, my girls literally spooned the extra crumb topping out of the bowl!   It consisted of mostly almond meal  and I’ve been seeing these little protein and no-bake bites all over the place, so I figured why not try and re-create the taste of the crumb topping in a little round bite?  And it worked!  My daughters gobbled them up and when I told them that the bites were actually good for them, they didn’t believe me!

Cinnamon has such a delightful flavor, and with the dates there is no need for sugar!  Feel free to double or triple the recipe, because they went pretty fast.  I’m excited to experiment with this whole bite idea now.  It’s brilliant really.  They are quick, easy, don’t need to be baked, and healthy too.  That’s just crazy business!


Ingredients

1 cup almond meal

1 tsp vanilla extract

1/2 cup pitted dates

1 tsp ground cinnamon


Method

Place all ingredients in a food processor and blend until all ingredients are well blended.  Take small amounts out at a time, mash together in your hand, and roll into a ball.  Continue until all of the mixture has been rolled up.  Place in the refrigerator for 15 minutes or so to let them set.  I rolled them around in a little almond meal for beauty’s sake, but they taste the same with or without! Almond Cinnamon Bites are delicious!

Cinnamon Almond Bites 02

Continue Reading

Creamy Saffron Shrimp & Oven Roasted Asparagus

Creamy Saffron Shrimp 01

First of all, I love seafood!  If it comes from the ocean, I’ll try it.  I recently realized that I don’t make a lot of seafood at home.  I always have some seaweed around and I make a little fish, but that’s about it.  I’m not really sure why but seafood has become more of a restaurant thing.

Last week I was feeling like the protein in our meals was getting repetitive and wanted to switch things up a little.  I was thinking, why in the world have I not made shrimp in like 2 years??  It needed to happen, so here it is!  A light smokey and incredibly flavorful dish that goes great with the oven roasted asparagus.  I’m thinking I may throw in a little extra cayenne pepper next time!

*Makes 3 to 4 servings

Ingredients

1 tsp vegetable oil

1 lb thawed medium or large shrimp

3 cloves garlic, diced

1 tbs arrowroot

1/4 tsp turmeric

pinch of ground saffron or 3 threads

1/2 teaspoon sea salt

cayenne pepper to taste

ground black pepper

1 cup milk of choice

1 Tbs butter or margarine


2 tsp vegetable oil

1 package asparagus (15 to 20)

salt and pepper


Method

In a small mixing bowl, whisk together the milk, arrowroot, salt, pepper, saffron, turmeric, and chili powder.  Set aside.  Heat vegetable oil in a large frying pan.  Add garlic and shrimp and cook on medium/high heat until all the water, if any,  has evaporated.  Reduce to low heat and add butter to the pan.  Allow butter to melt, then slowly stir in milk mixture.  Stir occasionally until the sauce begins to thicken.  Remove from heat.

Creamy Saffron Shrimp 02


Now for the asparagus.  Preheat your oven to 375*F.  Take 2tsp vegetable oil and coat the asparagus on a cookie sheet or oven safe dish. Sprinkle with salt and pepper and pop it in the oven for 10 minutes.  I sometimes add garlic or some other spices depending on what I’m serving it with.  Asparagus makes such a great side!


Continue Reading

Blueberry Almond Coffee Cake

Blueberry Almond Coffee CakeI have been craving coffee cake like crazy.  I can’t even remember the last time I had some.  Now that I think about it, I really just wanted that crunchy,cinnamony, sugary stuff that goes on top of a coffee cake.  You know, the little crumbles that kind of melt in your mouth but have this amazing texture.  Yup that’s the stuff!

A couple of days ago I decided it was coffee cake time! I was trying to think of a way to make it a little healthier and decided to incorporate some almond meal.  The blueberries give the cake some added moisture and flavor, and the cinnamon in the topping totally hit the spot.  The kids couldn’t wait for me to take it out of the oven!  It was really cute, they were just hanging out in the kitchen and asking if it was ready.

I let it cool for about 30 minutes and then it was like half the cake disappeared.  I was responsible for two slices and I don’t even feel bad about it.  The cake itself is dairy free, but there is a little butter in the crumb topping.  You can easily replace the butter with some margarine or a vegan alternative.


Ingredients

2 eggs

1/2 cup organic cane sugar

1/4 cup vegetable oil

2 tsp vanilla extract

1 cup gf flour

2/3 cup almond meal

1/2 tsp baking soda

1tsp baking powder

1/2 tsp xanthan gum

pinch of salt

1 cup thawed wild blueberries


For the Topping

1/2 cup almond meal

1/4 cup Gf flour

2 tsp cinnamon

1/2 cup brown sugar

1/4 cup butter (half a stick)


Method

Preheat oven to 350* F.  Grease a 8 or 9 inch springform pan and line the bottom with parchment paper. Grease the parchment paper as well.  I actually didn’t use a springform pan, but I definitely will next time.  It was a little difficult to get the cake out of the pan without the topping coming apart ,so I highly recommend a springform pan.

In a small mixing bowl, mix together the almond meal, gf flour, xantham gum, baking soda, baking powder, and salt.  In the bowl of your mixer beat eggs and sugar together on medium speed until it starts to foam up a bit.  Add in oil and vanilla continuing to beat on medium speed, then add in the flour mixture one cup at a time until completely combined.  Fold in the thawed blueberries and pour into prepared pan.

Put all of the ingredients for the cake topping in a small bowl and mix together with a fork or clean hands.  Sprinkle the topping over the cake batter and bake for about 30 min.  Allow it to cool for another 25 to 30 minutes and it’s all yours!

photo (1)


Continue Reading

Garlic Soy Chicken Glaze

Garlic Soy Glaze 01

We got serious about grilling a few years ago and between the hubby and I, I think we’ve got it covered.  I usually conjure up a marinade or rub and he grills.  With beef or lamb you can get away with putting a rub on it before it goes on the grill, but with chicken I feel like marinating ahead of time is a must.

I tend to forget to marinade the chicken I’m planning on throwing on the grill, and then I have to figure out something else for dinner last minute.  Oops!  So I was very excited to learn that there is such a thing as a glaze.  A glaze only needs to be brushed onto the meat while it’s on the grill, thus there is no need to marinade ahead of time!  I always use this glaze on chicken legs.  It has plenty of flavor and gives the chicken a nice crispy coating that makes biting in even better!

We grill a lot in the summer.  Everything from kabob to sausages, but this Garlic Soy Chicken recipe is a regular on the menu.

Happy grilling!


Ingredients

* Enough for 10 chicken legs

3 Tbs soy sauce

1 tsp honey

1/2 lemon, juiced

1/2 Tbs sesame oil

1/2 Tbs veg oil

2 tsp sea salt

2 Tbs gluten free flour

2 cloves garlic, diced or crushed

3 green onions, chopped

pepper to taste

1 cup water


Method

Place soy sauce and honey in a small mixing bowl and stir together until honey is blended.  Add next 8 ingredients and lightly stir.  Add gluten free flour and stir with a whisk until dissolved, then add water and lightly whisk together.  Believe it or not, that’s it! The trick is to continue to brush the glaze over the chicken while it’s on the grill.

Garlic Soy Glaze


Continue Reading