Shredded BBQ Chicken


Shredded BBQ Chicken


When I  moved to Orange County after college, my aunt lived around the corner from me.   I wasn’t married yet and I was working full time, so she was sweet enough to have me over for dinner every Thursday.  It was the first time I had ever lived away from home so it was really comforting to have her there and to have dinner with her and her family every week.  After some time I realized that she made everything from stew to pasta in the crockpot!  I had never used a crockpot and other than keeping things heated for parties, my mom never used hers either so I was amazed.

She taught me a few tricks of the trade like how the liquid doesn’t evaporate like it would on the stove and things like that.  When I got married my crockpot was a must on the wedding registry!  It is the best thing ever!  Back then I would let stuff cook all night or get it ready in the morning before I left for work.  Now, I can prep dinner in the morning and come home to a cooked meal after an evening of running the kids to soccer, or gymnastics, or whatever it is we’re doing.  Last night we had shredded bbg chicken sandwiches.  Well, most of us did.  I had my chicken on a bed of smashed cauliflower with a coleslaw style lettuce salad on top.  Yummy!  I have been meaning to get this recipe on the site because it is just too awesome not to!  It is one of the simplest recipes plus your crockpot does the cooking while you’re out and about taking care of business.

I started making this after eating something similar at my friend’s place.  She had chicken simmering in the crockpot for hours while we had coffee and the kids played.  She served it with tasty sides like bread rolls, baked beans, and coleslaw.  Most of the kids and the adults made sandwiches and customized it to their own taste.  I had mine like a salad and everyone was happy.  When I make it at home I usually put it on top of some coleslaw in a very light mayonnaise and vinegar dressing.  BBQ chicken is really good with coleslaw for some reason!  They taste great together.

I never actually asked her for the recipe, but I make my crockpot chicken tacos all the time so I figured these would need around the same cooking time and amount of liquid.  I have used paleo bbq sauce and the all natural bbq sauce from Trader Joe’s.  The flavor was great with either one, so use whatever makes you happy.  Every family has their own taste, so what works for one may not suit the other’s preferences.  We don’t really eat baked beans and the hubs and I try not to eat bread at dinner time so I make sandwiches for the kids with the shredded bbq chicken, coleslaw, and some cheese.  That way us adults get a filling paleo style meal that we totally enjoy!  It’s a win/win and everyone is happy.


Shredded BBQ Chicken 01


Shredded BBQ Chicken 02


*Makes 4 servings

Ingredients

2 chicken breasts

2 cloves garlic

1 onion, sliced

1/2 cup BBQ Sauce

1/2 cup water

1 tsp sea salt

1/4 tsp ground pepper


Method

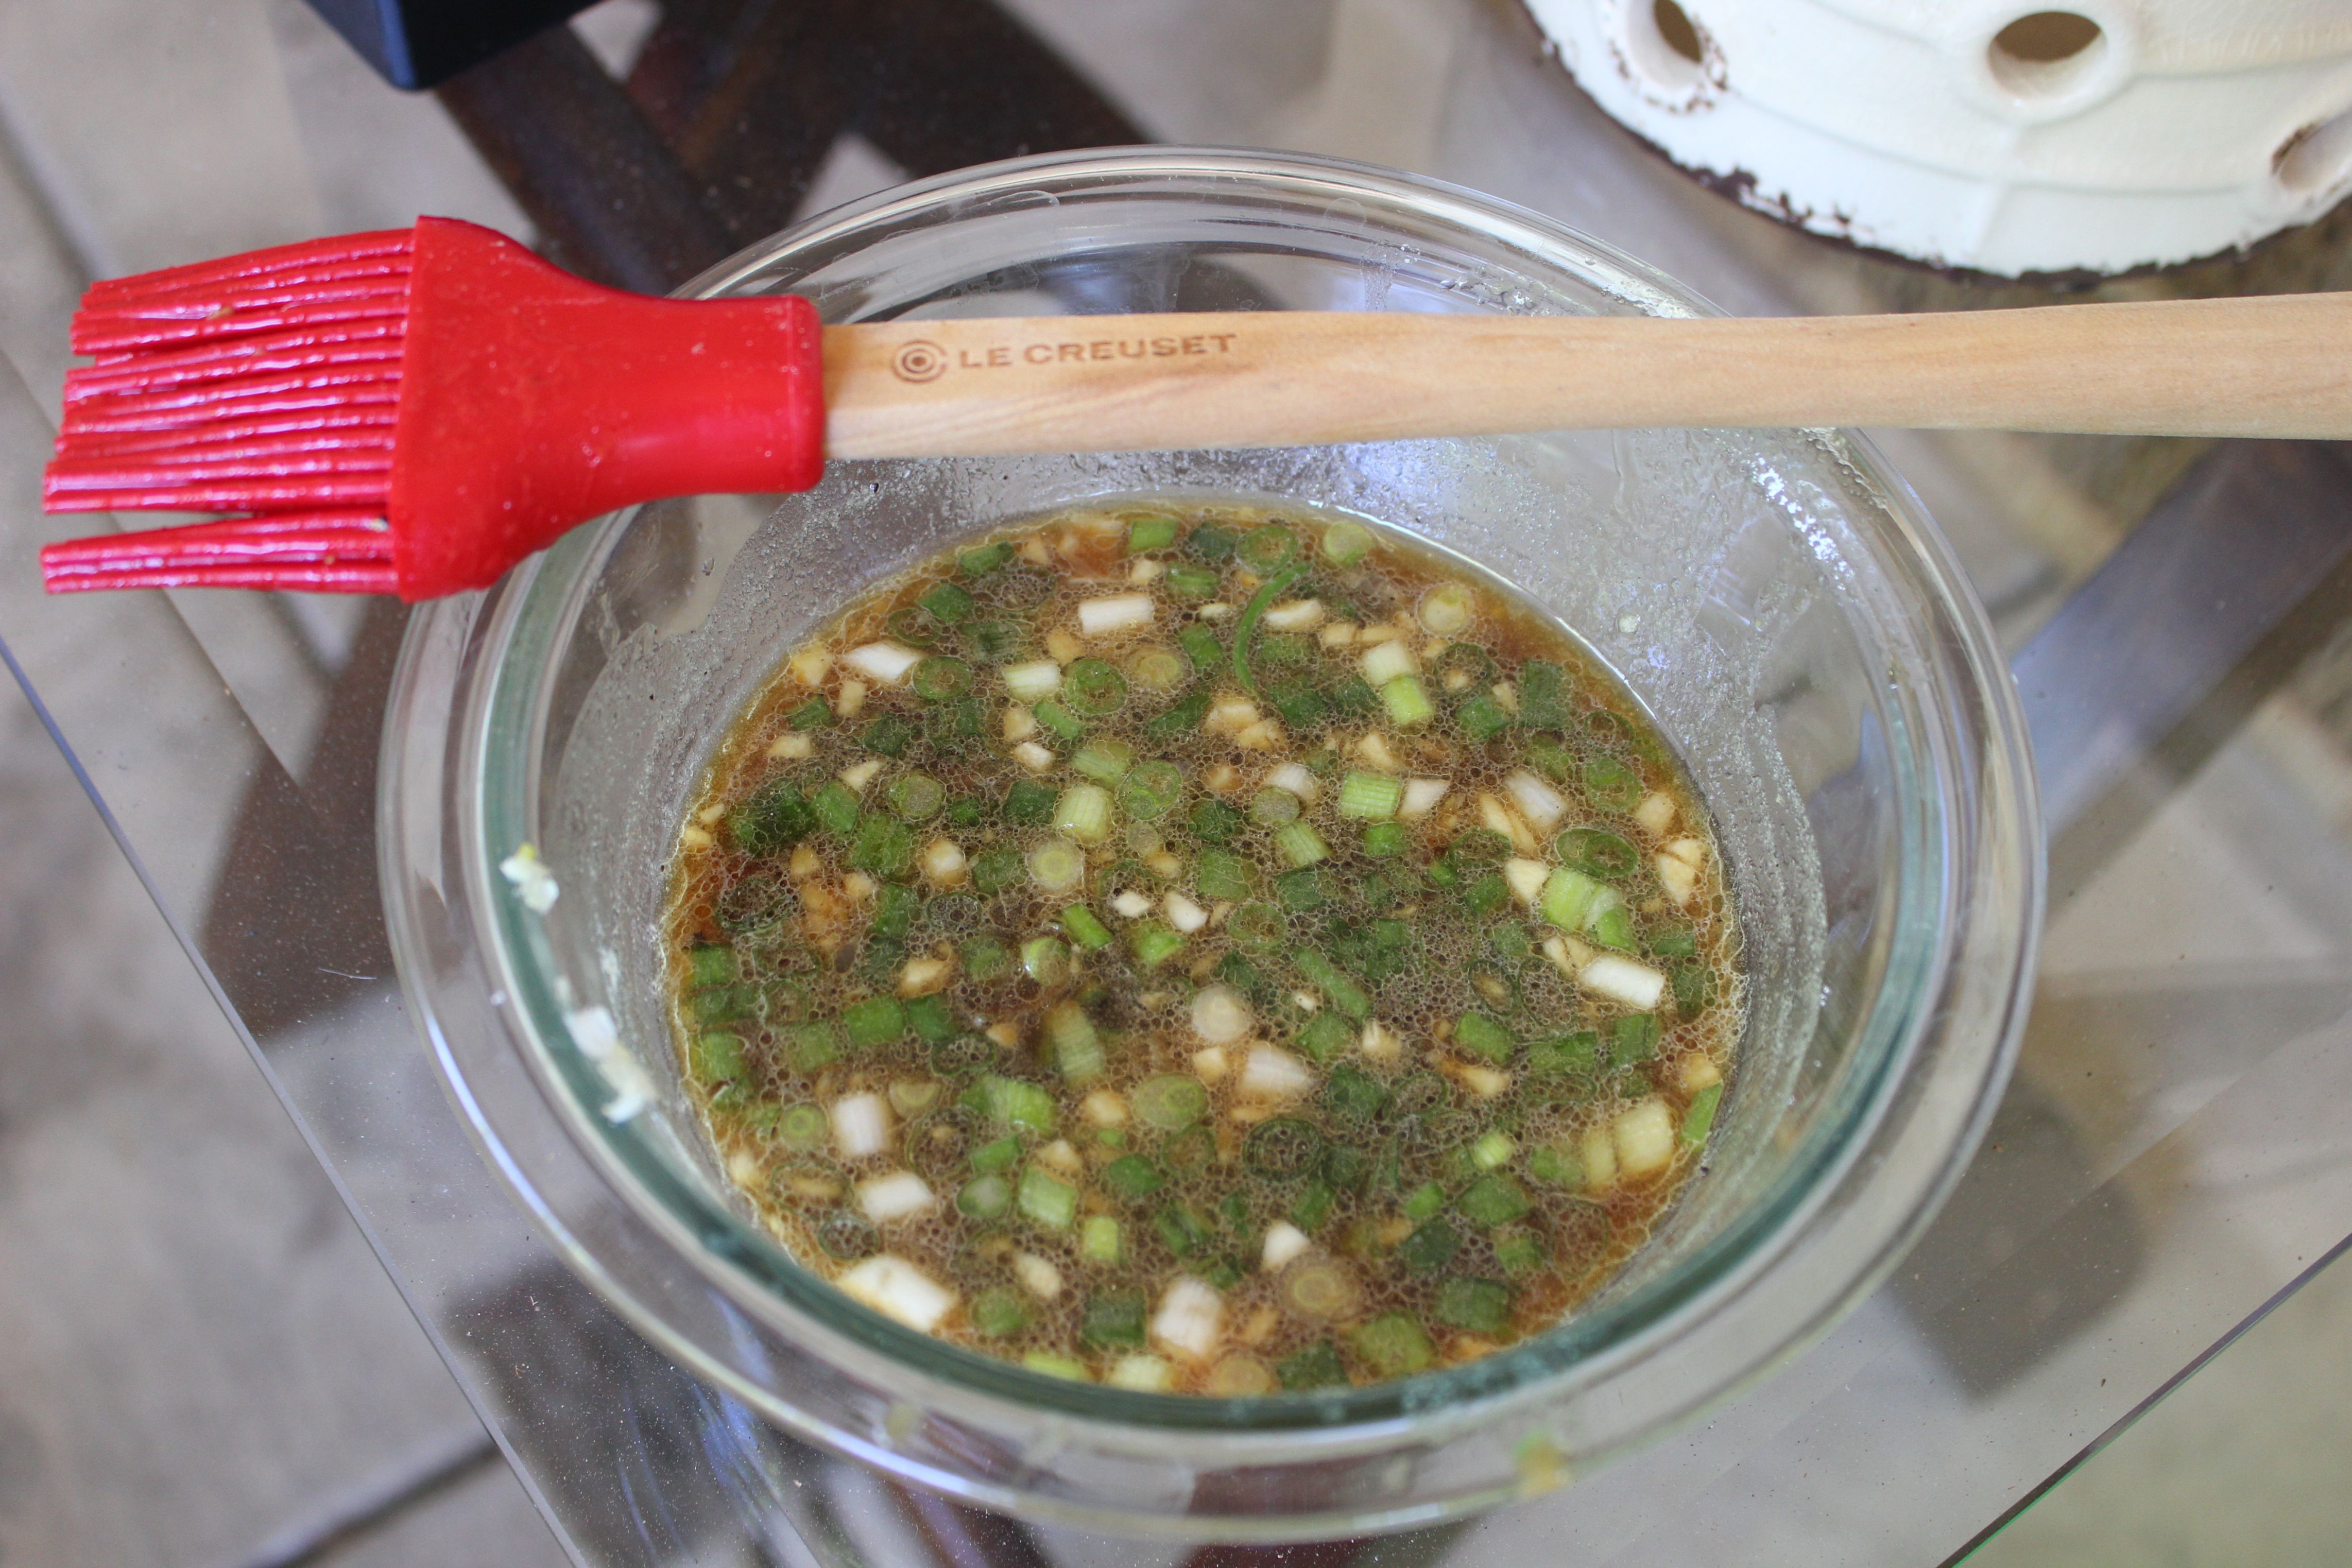
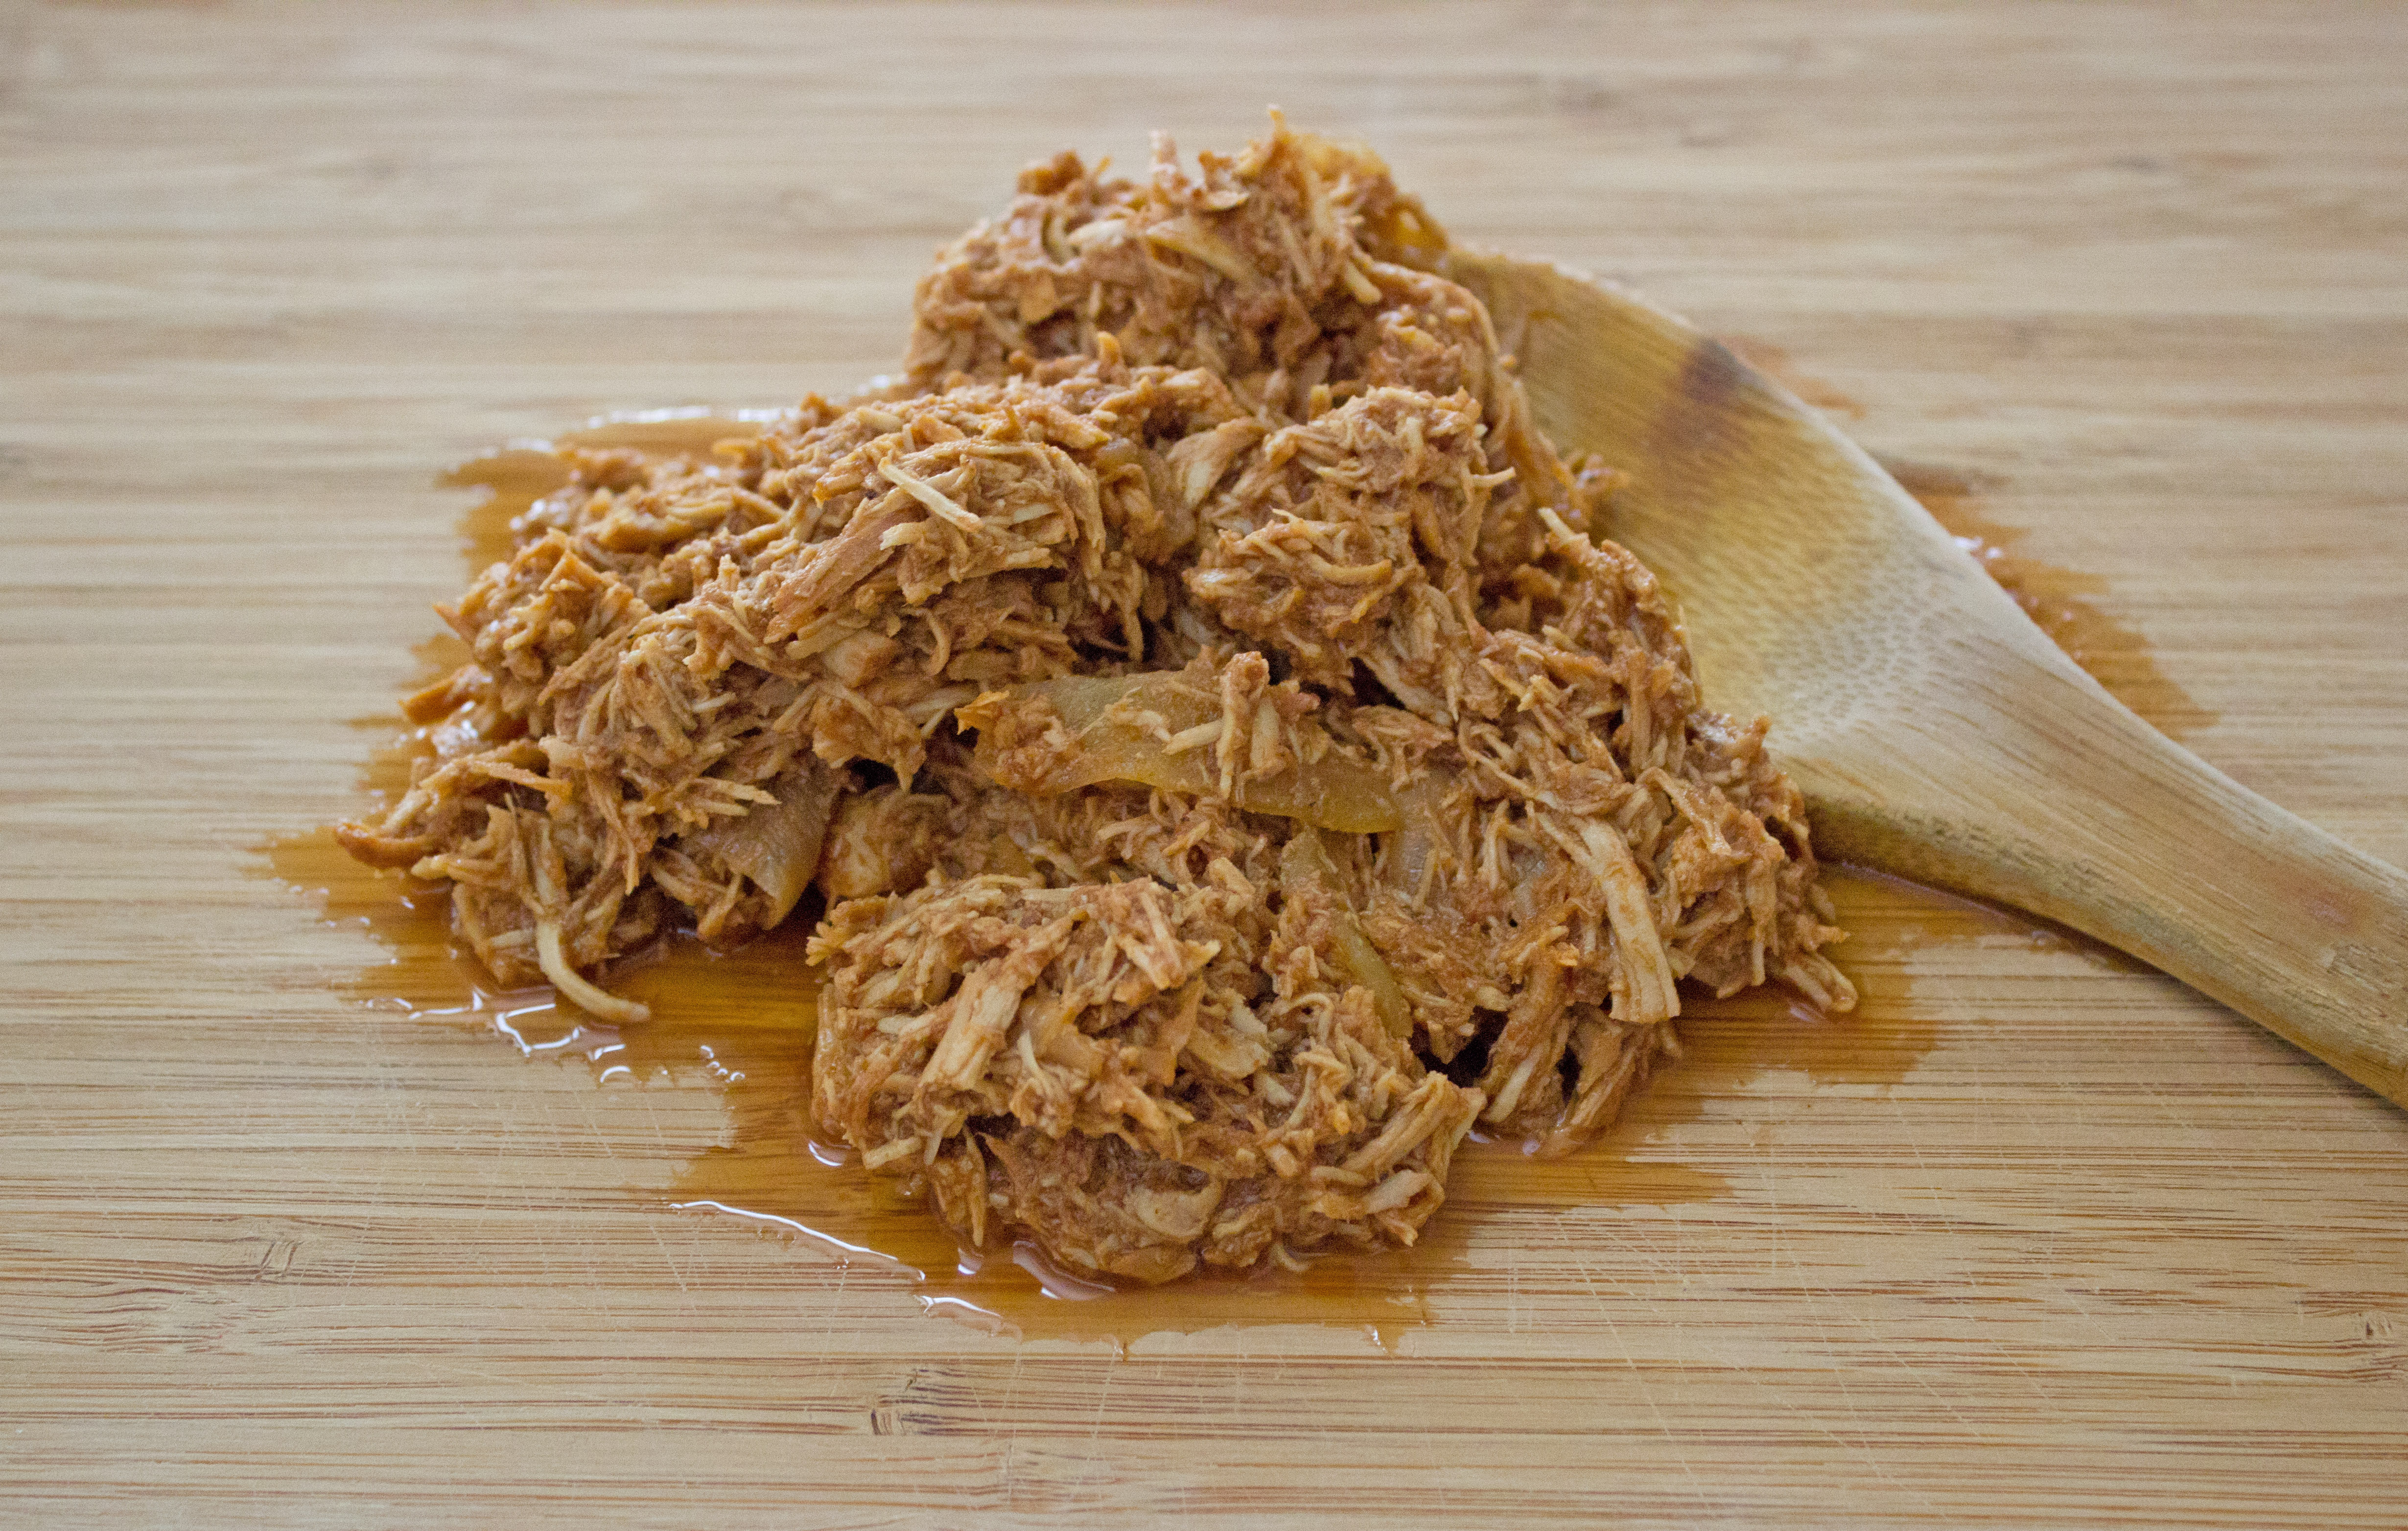
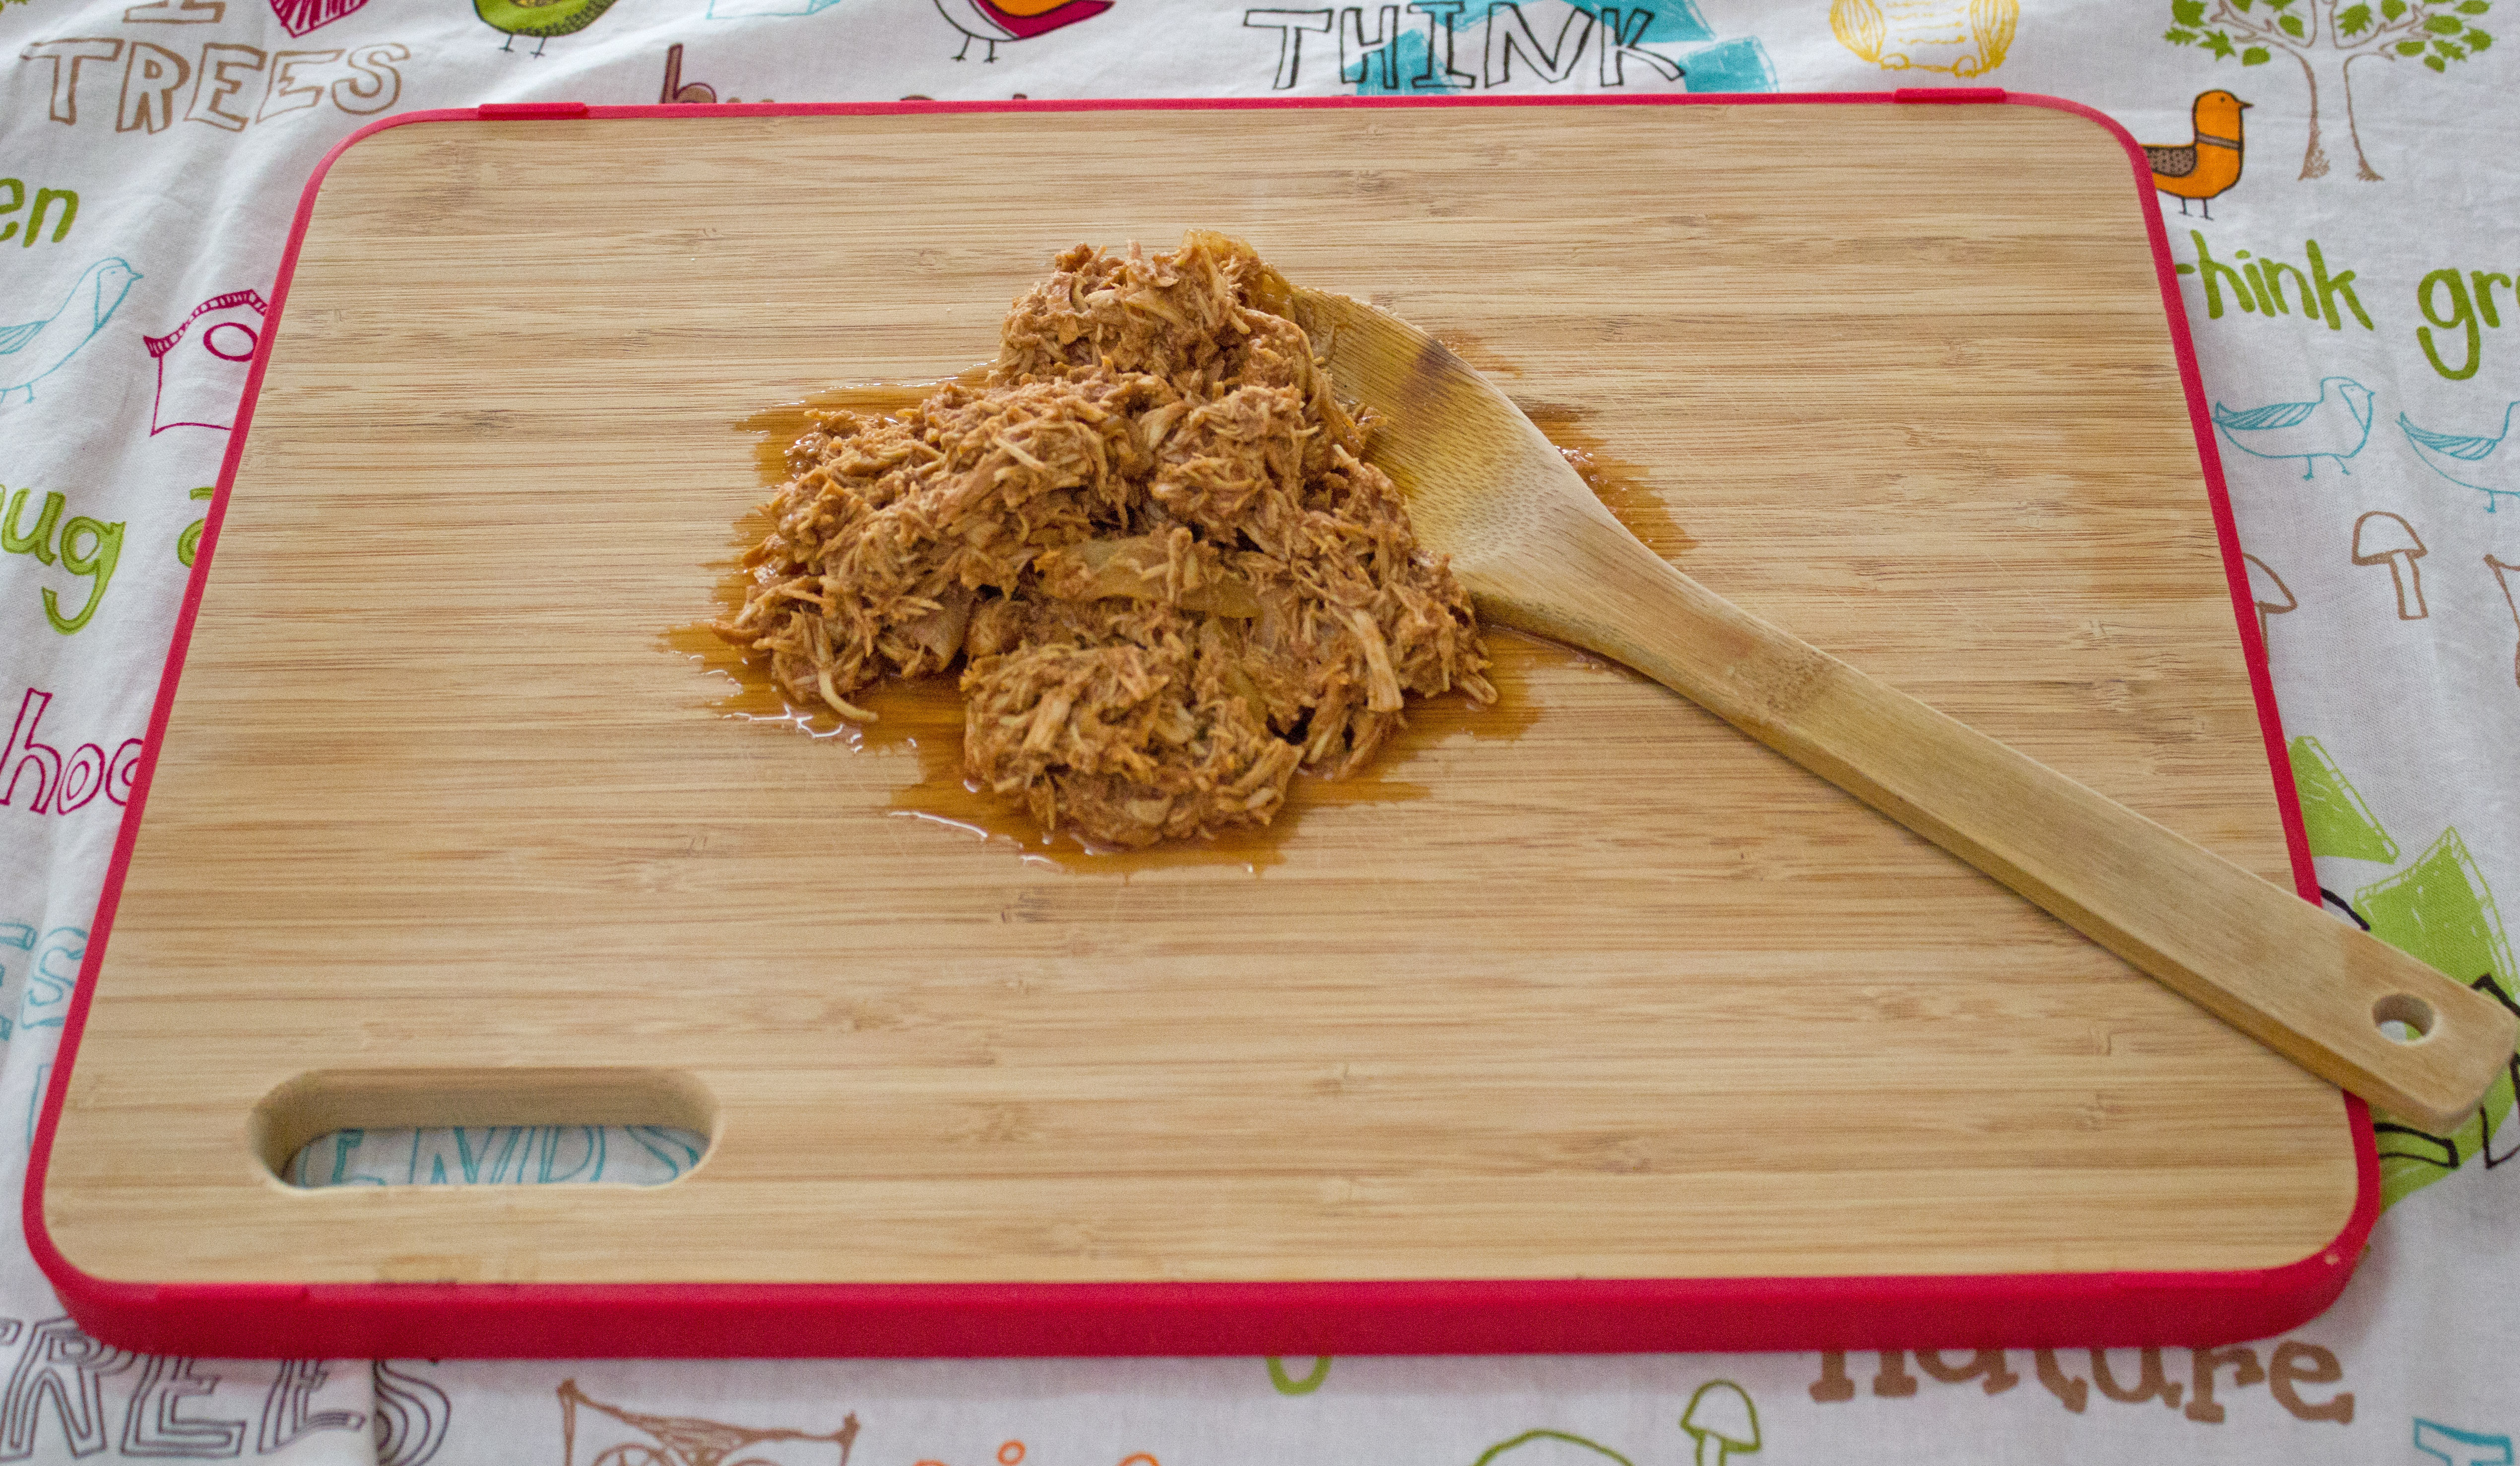
Plug in your crockpot and set it to a low setting.  My crockpot isn’t fancy so there is a High setting and a Low setting.  I set it to low for this recipe.  Mix the BBQ sauce, water, salt and pepper in a bowl.  Put the rest of the ingredients in the crockpot, then pour the BBQ Sauce mixture on top.  Place the lid on your crockpot and allow everything to cook for at least 5 hours.

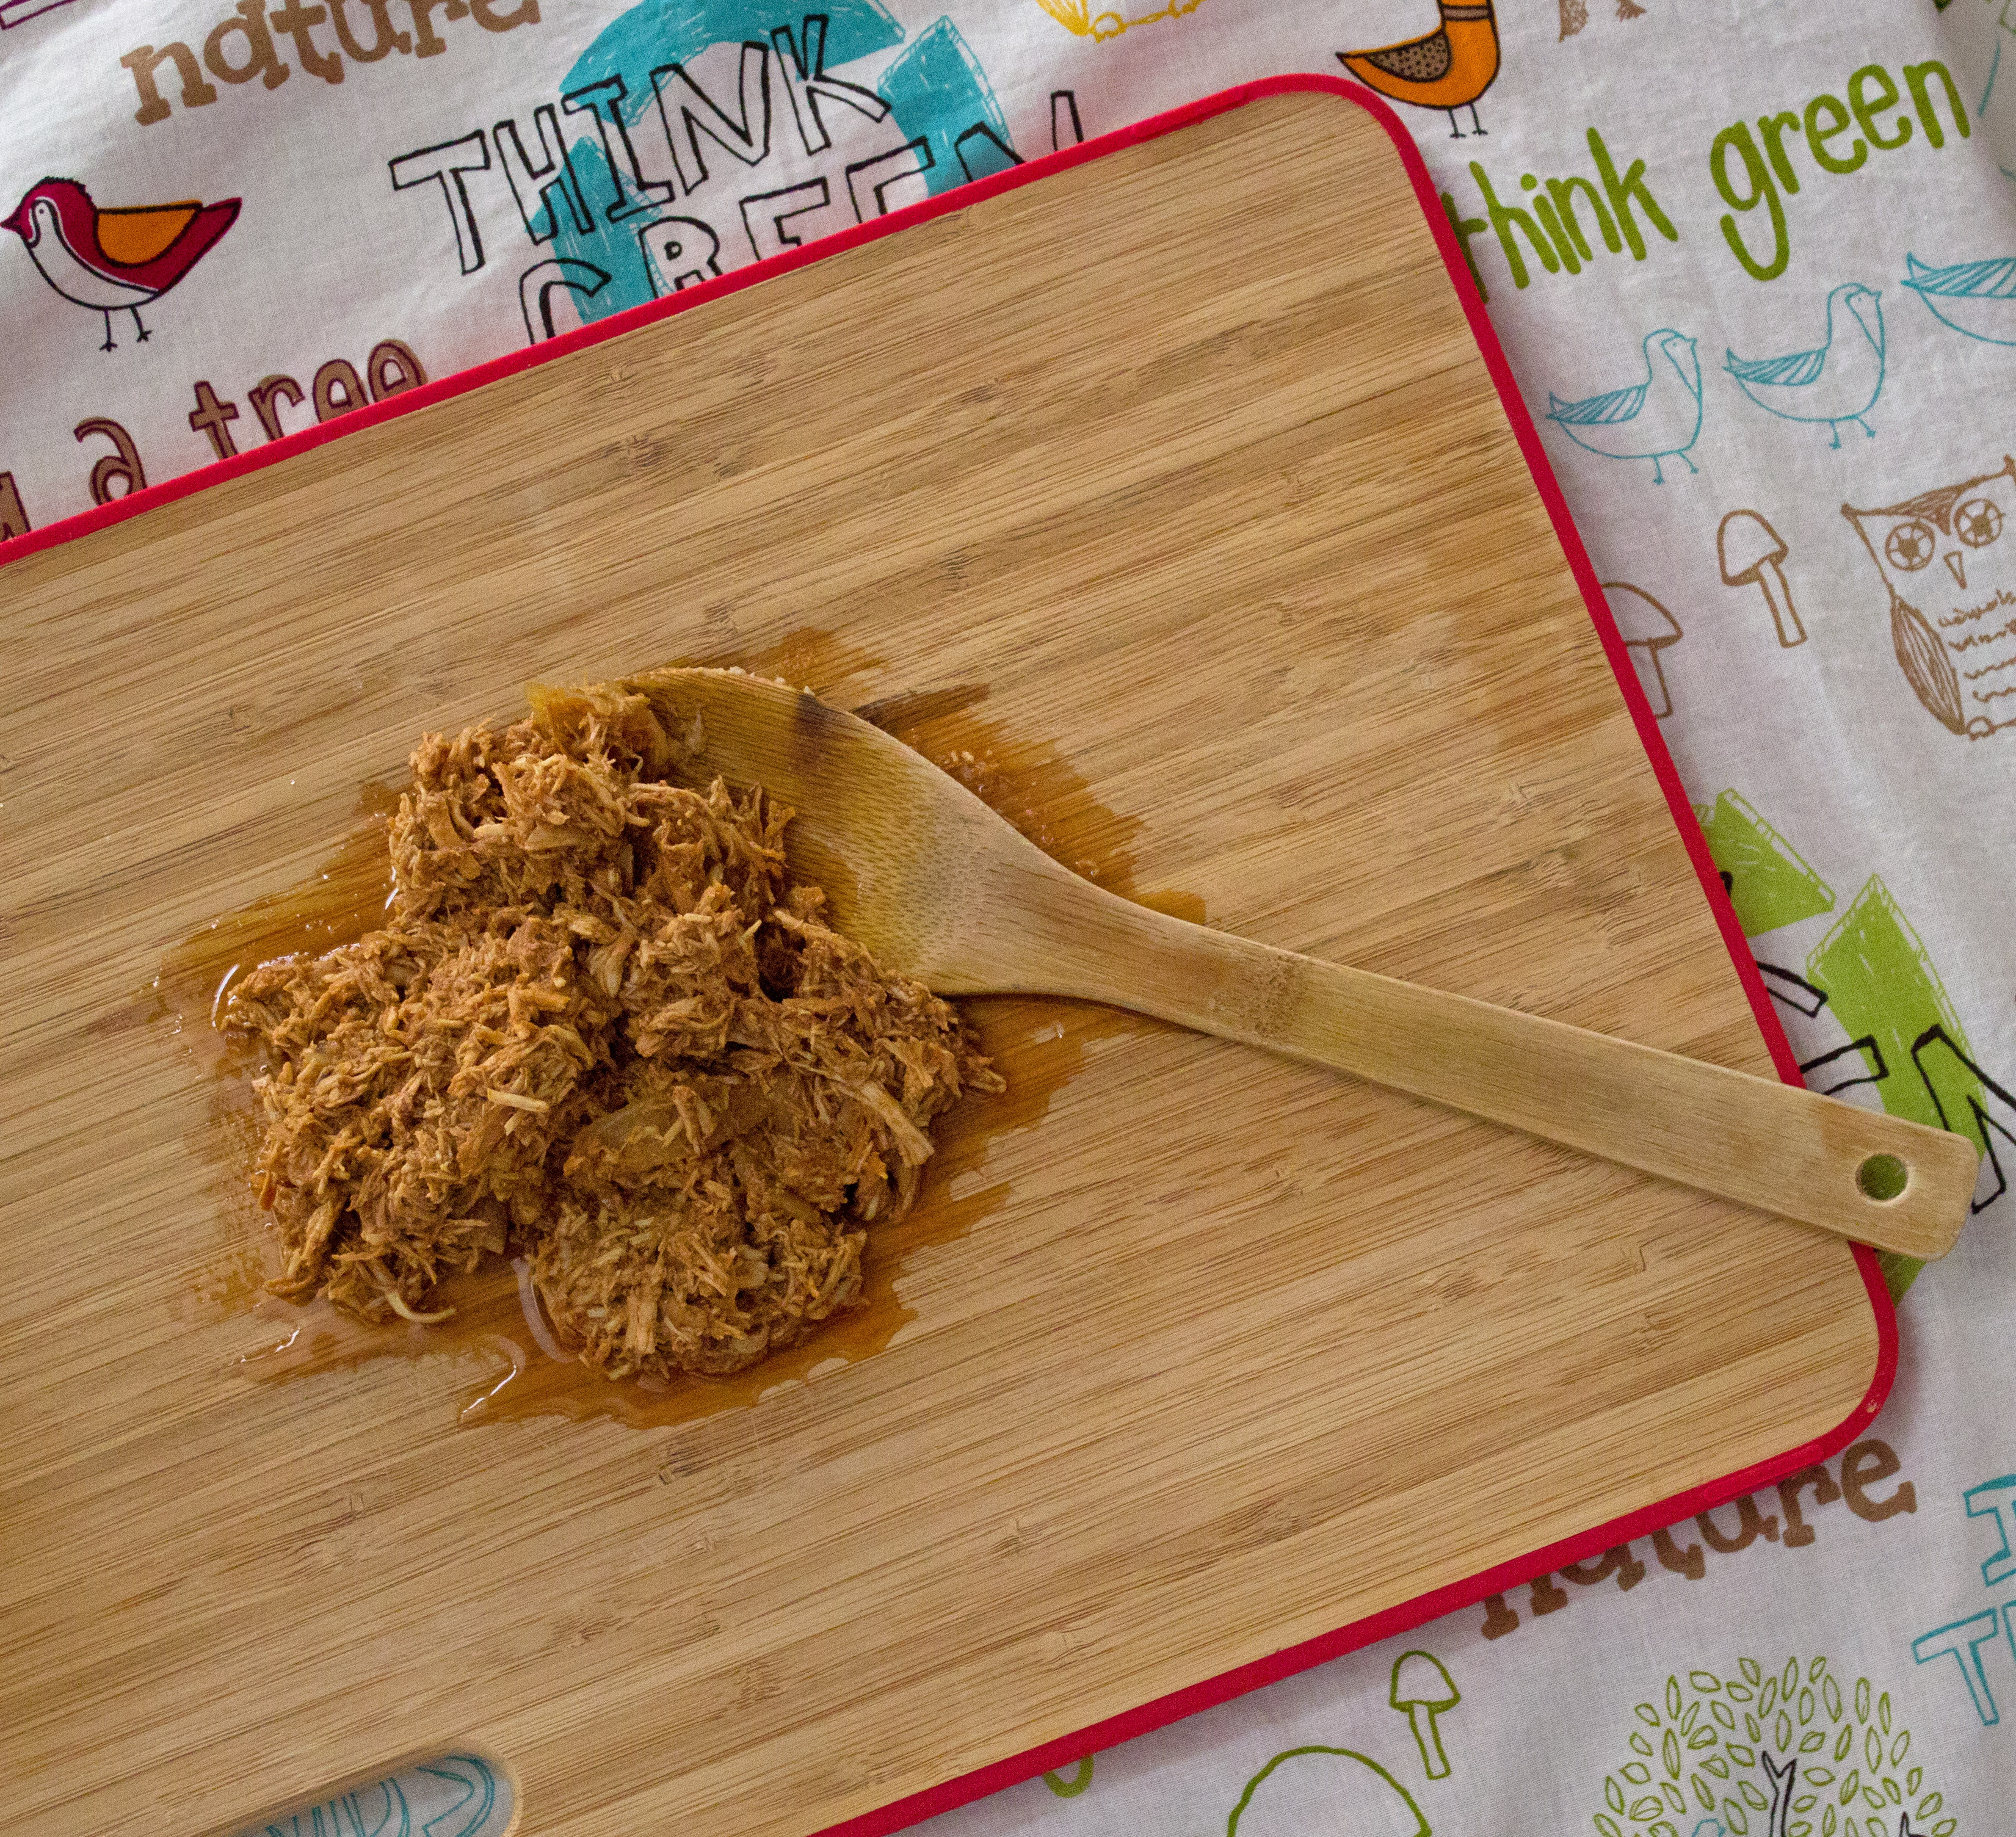
You can leave it on longer if you need to or if you want to cook it in less time just turn the dial on the crockpot to high and cook for 3 hours.  That will work too!  When the time comes, take a wooden spoon or a cooking utensil that won’t scratch up your crockpot and shred up the ingredients in the pot.  This shouldn’t take long since everything will be falling apart by this point.  Make shredded BBQ chicken sandwiches or serve it with sides, whatever works at your house!

Continue Reading

Crustless Leek Quiche

crustless leek quiche 03


We had so much amazing food over the holidays!  So much!  Most of my usual no-no’s went right out the window so I was eating everything my little heart desired except for the gluten of course.  Gluten is the only thing that I absolutely cannot have.  We ate apple pie, pumpkin cheesecake, chocolate bark, cookies, my friend’s amazing paella and my sister made this wonderfully rich leek quiche on a gluten free crust, and the list goes on.  I think I ate the quiche leftovers for breakfast, or possibly a midnight snack.  It was so yummy but it was also full of heavy cream and goat cheese and butter and all those lovely things that I don’t eat on a regular basis anymore.

I’m usually okay, but this year my insides were just not havin’ it!  My stomach was like, “where’s my kale and my protein shake?” So when I got a craving for that fabulous leek quiche a couple weeks after we’d had it, I knew the heavy cream was definitely not happening and I left the crust and the cheese out too.  I pretty much altered the recipe entirely and made it my own.  Funny how that happens!  It’s so yummy though, and it’s the best accompanied by a piping hot bowl of your favorite soup.  That’s usually how I have it.  I have made it a few times now and sometimes I’ll sprinkle a little goat cheese on top before I put it in the oven but it really doesn’t need anything else as long as you’ve got the bacon in there!  Oh yes, because there is definitely bacon in there and there are green onions and flavorful leeks.  I always use turkey bacon whenever bacon is called into action in a recipe, but if you use the OG stuff then go for it!

It was strange for me to feel all bloated and uncomfortable even though I had been eating gluten free.  I guess that’s what happens when you eat clean and mostly paleo and then you devour everything in front of you for a couple of weeks.  It’s not pretty!  I guess I deserved it, I mean I sort of went on a cheese binge and lets not forget about all the sweet stuff.  But alas, I had to go back to my clean eating ways and quite honestly I’m okay with it.  I feel better and my stomach is happy with me again and that’s always a good thing!


crustless leek quiche 01


crustless leek quiche 02


crustless leek quiche


Ingredients

1 tsp vegetable oil

1 1/2 trimmed leeks, chopped

3 green onions, chopped

3 cloves garlic

4 slices turkey bacon

4 eggs

1 cup almond milk

1/4 tsp sea salt

ground black pepper


Method

Add oil to a pan and heat on medium heat.  Once the oil has heated up add the leeks, green onions, garlic, and turkey bacon to the pan.  You can always use regular bacon if you prefer.  Saute the ingredients on medium/low heat for 10 minutes, stirring occasionally.

While the leek mixture is cooking, crack open 4 eggs into a bowl.  Beat the eggs and add the almond milk and salt to the bowl and mix well.  Once the leeks are done cooking, remove them from heat and heat your oven to 350*F.  Allow the leek mixture to cool for a few minutes while the oven is heating up.  Then add it to a greased baking dish and pour the egg mix on top.  Sprinkle with some black pepper and throw it in the oven for 20 to 25 minutes.  Serve as you please!

This also makes a great base recipe that you can add other ingredients to.  You can use the same egg mixture but maybe make a spinach and mushroom quiche or an asparagus quiche.  You can follow this recipe but switch out the veggies or even the protein you use.  I’d love to hear how you change it up in your kitchen!

Continue Reading

Thai Basil Curry (gluten free, dairy free, & paleo, with a vegan option)

Thai Basil curry 01


At our last place there was a Thai restaurant right down the street that had the best Green Curry.  It was incredibly convenient because they delivered and if we had last minute guests we would just order and have it delivered to the house. The girls loved their chicken satay and the hubs and I would order the green curry at least a couple of times a month.  It was such a great take-out spot for those lazy Friday nights.  Since we moved two years ago, I haven’t been able to find a Thai place that we really like so I started making Thai Curry at home whenever I get a craving for it.

There are several types of Thai curry, but the one I like the most is the green curry.  Thai basil and chilies give the curry its green color and fabulous flavor.  Luckily with a little help from some green curry paste I’ve been able to recreate that awesome flavor at home.  Thai curry is also dairy free, which makes it paleo friendly as well.  It would still be nice to find a good Thai restaurant around here, but when I make it I can put whatever I want in it!

This time I went with mushrooms, but I’ve made Thai basil curry with bamboo shoots or bell peppers, eggplant tastes delicious in it too!  If you prefer a vegan meal, just leave out the chicken.  It’s amazing either way, and can all be prepared in one skillet. I have been leaning toward the paleo lifestyle these days so I served it on my current fave cauliflower rice, but white or brown rice are both wonderful additions.  I’ve had it solo before too, but I just love having something in my bowl that soaks up all that yummy curry sauce!

Oh that reminds me, the chicken in this dish is cut into thin slices.  The easiest way to get your chicken cut very thin is to slice it when it’s frozen.  I let the chicken thaw about 10 minutes, then I slice it.  That way you don’t have to break your arm trying to cut through it when it’s frozen solid!


20150728_191540

Ingredients

*Serves 2 to 3 people

1 chicken breast half, thinly sliced

3 cloves garlic, crushed or diced

2 cups sliced mushrooms (or other vegetable of choice)

1/2 of a Thai chili, sliced

7 oz full fat coconut cream

1 Tbs Green Curry Paste (I use Thai Kitchen paste, since it’s GF)

1 cup Thai basil

1/2 lime, juiced

salt and pepper to taste

cooking oil


Method

Heat 1 tsp cooking oil in a large pan.  Place sliced chicken in pan and cook until both sides are slightly golden.  Add the garlic, Thai chili slices, and mushrooms to the pan and cook on medium/low heat stirring occasionally for 5 minutes.

Reduce the heat to low and add in the coconut cream, green curry paste, Thai basil, lime juice, salt, and pepper.  Stir it well and let simmer for another 5 to 10 minutes.  If the cream thickens a little, just add some room temperature water, a tablespoon at a time until you reach the desired consistency.


20150728_193518

Continue Reading

Tangy Chicken Tacos (paleo & gluten free)

Tangy Chicken Tacos 01

Its funny how cooking is sometimes like a science experiment.  You add a little bit of this and a little of that, then wait to see if its amazing or blows up in your face.  There were many experiments that took place in our kitchen before I got a handle on the spices and ingredients that I now use on a daily basis.  We live in such an international world though, that I’m always finding new and unfamiliar ingredients that I want to play with and the experiments begin again.  I never thought food would be my thing, but it is.  I love happy faces after a good meal, I love cooking and eating with my family and friends, and I love making something new and wonderful!

In this case, the new and wonderful something is these Tangy Chicken Tacos.  I was given a recipe for Thai Lettuce Wraps a couple months ago, and a few of the ingredients were not gluten free.  One of those ingredients is plum sauce.  The idea of a tart sauce just sounded really tasty, so I was trying to create a bit of tang in this version as well.  I mixed red wine vinegar and tamari, not sure what the flavor would turn out like, but it was exactly what I was aiming for!  Just goes to show that you never know until you try.

In an effort to get some extra veggies into the meal, I added broccoli and mushrooms, and served them in a romaine lettuce shell.  They are ready in jiffy, which is a must for me.  If a meal takes longer than 45 minutes, it is not happening in my kitchen during the week!  I dice everything so it cooks a little quicker, and the hubby almost didn’t notice all the broccoli.  He’s not really a broccoli fan.  Oh well!  How can you not like broccoli?!?  I’ve made them about three times since and they’ve become a quick favorite.


Ingredients

1 tsp cooking oil

3 chicken breast halves, diced

3 cloves garlic, crushed

1 cup chopped broccoli

1 cup chopped mushrooms

3 Tbs Tamari

2 1/2 Tbs Red Wine Vinegar

1/4 cup chopped basil

1/4 tsp red chili flakes

2 Tbs water


Method

Heat oil in a large pan and add diced chicken.  Cook on medium heat until chicken is golden.  Add the garlic, chopped broccoli, and mushrooms.  Stir in the red wine Tamari, red wine vinegar, basil, dried chillis, and water.  Simmer on low heat for about 5 minutes.

Scoop some into your lettuce shells, and your one skillet meal is complete!

Tangy Chicken Tacos 02


Continue Reading

Goan Fish Curry (paleo, gluten free, & dairy free)

Goan Fish Curry

Along the Arabian Sea, to the South of Maharashtra, you’ll find India’s smallest state; Goa.  Goa is a tropical paradise known for its variety of fish and rich cuisine.  There is an abundance of coconut trees in Goa, so coconuts and coconut oil are used in many dishes along with an array of spices.

I have yet to visit this wonderful place, but I adore fish curry and Goa is famous for theirs!   Goan fish curry is usually served on rice, and there are two kinds.  One type of fish curry has a tomato base and the other is made with coconut cream.  I haven’t been eating much rice lately, so I wanted something I could have almost as a stew.  Coconut cream sounded just dreamy, so I thought I’d give it a shot!

I decided to go with a milder fish so it would take on the flavor of all the spices a little better.  Some Asian super markets carry fish of the Indian variety, but I picked up some Tillapia from Wholefoods this time.  I Had to keep tasting it to make sure I had all the flavors right, since I had never made Goan fish curry before.  Thankfully my in-laws were there to help judge the taste!  After some constructive criticism and some added ingredients, it was approved!

The most challenging part of Indian cooking for me has always been perfectly balancing the flavors.  Some dishes require 8 or more different spices, and with so much happening in a dish it can be a struggle to keep one flavor from overpowering the others.  Over the years I’ve gotten the hang of it, but it took some serious trial and error!  Especially since when I first started making Indian food, I had no idea what some recipes were supposed to turn out like.  Now I can honestly say that this is a well balanced, packed with amazing spices, rich Goan fish curry!


Ingredients

Serves 4

4 Tilapia fillets

2 tsp turmeric powder

1 onion, diced

3 cloves garlic, crushed

1/4 tsp grated fresh ginger

1/4 tsp mustard seeds

2 tsp garam masala

1 tsp cumin powder

1 tsp cayenne powder

1 1/2 tsp vinegar

1 1/2 cups coconut cream

1/2 cup water

sea salt to taste

cooking oil


Method

Rinse the Tilapia and pat dry with a paper towel to remove moisture.  Then rub the Tilapia with the turmeric powder and refrigerate for about 15 minutes.

While the fish is in the fridge, you can prep the curry.  Heat  about 1 tsp oil in a large saucepan at medium/high heat.  Add the garlic and onions and saute until they start to brown.  Next throw in the ginger, mustard seeds, garam masala, cumin, and cayenne.  Stir well and reduce to low heat to let the flavors get to know each other for 3 to 4 minutes, stirring occasionally.  Add the coconut cream, water, vinegar and salt to taste.  Stir and let the curry simmer for about 10 minutes.  If your saucepan has a lid, you can place the lid on the pan while it simmers.

While the curry is sitting on low heat, heat 1/2 Tbs oil in a large pan on medium heat.  Usually the fish in Goan fish curry is deep fried.  I wanted to cut the oil, so this fish is lightly fried.  Add the fish to the pan and fry for about 4 minutes on each side or until each side is cooked.  Remove from heat and add the fish to the curry in the saucepan.  Cook for an additional 15 minutes and serve over rice, quinoa, or serve it in a bowl like a soup.  That’s how I had mine and it tasted like paradise to me!


Continue Reading

Zucchini Pancakes with Piri Piri Aoli (paleo & gluten free)


Zucchini Pancakes
Zucchini Pancakes

Back when we were dating, the hubby came back from a trip to London raving about Piri Piri sauce. Pronounced Pee-ree Pee-ree, it is actually the African bird’s eye pepper. It was used by Portuguese settlers who found it while exploring in Mozambique and fell in love with it as we have.  A few ethnic markets near us started carrying Piri Piri hot sauce from time to time and we would stock up whenever we saw it.  Once I tasted it, I realized what all the hullabaloo was about!  The flavor in that stuff is off the charts!  It is not your typical hot sauce.  Now I pour it on eggs, veggies, and everything in between.

I met some friends for brunch this past weekend and somehow Piri Piri sauce came up.  We were talking about all the things you could do with it.  I don’t know why we were talking about food while stuffing our faces, but I feel like I’m always talking about food! When I got home I remembered that I had picked up a bottle of Piri Piri spice blend from the Savory Spice Shop in San Diego.  I believe you can order online from them as well.  I also had a ton of zucchini in the fridge and was thinking I would make a frittata or maybe a crustless quiche this week.  Smaller versions of things always seem more appealing, so I decided on zucchini pancakes.

Now, how do I incorporate the Piri Piri spice and trick my husband into eating a whole lotta zucchini??  There’s a recipe for making hot sauce on the bottle but I wanted something creamy.  Plus, I already have a bottle of the hot sauce in the fridge.  Aoli sounded perfect!  A little mayo, a little olive oil, some of the Piri Piri Spice, and done.  My husband had seconds!  The kids opted for ketchup as the Piri Piri aoli has a little kick to it.  If you’re worried about too much heat, I would recommend adding half the amount of Piri Piri spice and then tasting it to see if you want to add more or not.


Ingredients

Zucchini Pancakes

2 eggs

1 lb zucchini, grated

1/2 cup almond flour

3 Tbs amaranth flour

1 clove garlic, crushed

1/2 tsp sea salt

1/4 tsp ground pepper

Cooking oil


For the Piri Piri Aoli

3 Tbs mayo

2 Tbs olive oil

1 tsp Piri Piri seasoning


Zucchini Pancakes 03

Method

Pat the grated zucchini down with a paper towel, or two in needed to help reduce moisture.  In a medium sized mixing bowl, beat the eggs then add the remaining ingredients for the zucchini pancakes.  Blend together with a fork until combined.  Heat about one tsp oil in a large frying pan on medium/high heat.  With a large eating spoon, place a scoop in the pan and flatten the zucchini with the spoon if needed so it takes on more of a round shape.  Repeat until the pan is full, leaving a little space between each pancake.  Cook until both sides are browned, around 2 to 3 minutes per side.  Remove from pan and repeat until all the mixture has been made.

Zucchini Pancakes 04

In a small bowl, mix the ingredients for the aoli together.  Mix it well, and pour right on top of your zucchini pancakes or on the side.  If there is any aoli leftover, it keeps well and tastes great on everything.  I put some on my eggs and toast today!


Continue Reading

Stuffed Bell Peppers (vegan, paleo, & gluten free)

Stuffed Bell Peppers 03

I was doing a sort of cleanse a couple weeks ago and there were no carbs allowed for a week.  Yup, a whole week!  It was strictly protein and veggies.  Now I know this is normal for many, but not for me.  I don’t eat much bread or rice, but I NEED my fruit!

We don’t eat meat in our house on Monday, and usually I make lentils or something involving rice or pasta.  I noticed that one of the meal suggestions for the week was stuffed peppers with ground beef.  I was a vegetarian years ago and with being gluten intolerant you get very used to removing certain ingredients from recipes.  You know, burger with no bun, wrap with no tortilla, substituting flours, etc.  The list goes on and on.

I tried to pack quite a few veggies in there and they came out tasting really good!  So I made them again last night for Monday night dinner.  They can be topped with a little dairy or vegan cheese if you like.  For all the carnivores out there, sausage, ground beef, or ground turkey would make a tasty addition!  If you use a seasoned sausage like Italian or something, just leave out the oregano and basil, and add less salt.


Ingredients

1 onion, diced

4 cloves garlic, crushed

6 bell peppers, any color

1 eggplant, diced

1 zucchini, diced

4 oz mushrooms, diced

14.5 oz can organic diced tomatoes

3 Tbs tomato paste

2 tsp dried oregano

1 tsp dried basil

salt and pepper to taste


Method

In a large skillet, saute the chopped onion and garlic until onions are translucent.  Add in the rest of the veggies, the diced tomatoes, tomato paste, and spices.  Simmer for 15 minutes then remove from heat.

Preheat the oven to 350* F.  Cut the tops off of the bell peppers and clean out the seeds.  Fill the peppers and pack them full.  Place the tops back on each one and put toothpick through opposite sides on top of the pepper. This will help keep the tops of the peppers on while they’re in the oven.

Place peppers in an oven safe dish and bake for 30 to 40 min.  Let cool for a few minutes since they’ll be piping hot and dig in!

Stuffed Bell Peppers 01

Stuffed Bell Peppers


Continue Reading

Sun-Dried Tomato Chicken Sausage and Spinach Pasta

Sun-Dried Tomato Sausage and Spinach Pasta 01

Long ago in the suburbs of Los Angeles, there was a girl who thought she would never again eat a deliciously comforting bowl of pasta.  Well, that girl was wrong!  For years later the magical elves of the cooking world created gluten free pasta that tasted wonderfully magnificent.

Seriously though, I would dream of pasta!  I went without for a few years so I don’t crave it as often, but my kids ask for pasta at least once a week.  Pasta is just so versatile.  Add sauce or just do olive oil; only add veggies or add meat too.  It can be thrown together rather quickly, which is great for weeknights.

Chicken sausage is also one of the items that is always on my grocery list.  I try to keep at least two kinds on hand at all times.  It works for breakfast, lunch, and dinner and can be added to almost anything.  I prefer the organic brands like Applegate Farms or Aidells, but that is purely a matter of preference.  In this recipe I used the Aidells Sun-Dried Tomato Sausage.  There are other brands that make a sun-dried tomato sausage as well.  I have bought the Trader Joe’s one many times before and it always tastes great!


Ingredients

1/2 of a 16oz package gluten free spaghetti, cooked and drained

2 1/2 Tbs extra virgin olive oil

2 cups chopped spinach

1 cup chopped fresh basil

1 clove garlic, diced

1 cup mini mozzarella balls, cut in half

1 tsp sea salt

pepper to taste

4 sun-dried tomato chicken sausages, sliced

1 tsp vegetable oil


Method

Once the spaghetti is cooked and drained, toss it with the olive oil so that it doesn’t get stuck together.  Put it in a medium sized pot and set aside for later.

Heat 1 tsp vegetable oil in a large pan over medium heat.  Add in the sliced sausage and cook until both sides are browned.  About 3 minutes on each side should do it once the pan is nice and hot.  Remove from heat.

Add the spinach, basil, garlic, sea salt, pepper, and the cooked sausage to the spaghetti and toss together.  Heat on low for 5 to 10 minutes until everything is heated.  Remove from heat, mix in the mozzarella, and serve.  If you add the mozzarella balls in earlier, they will melt!

Red chili flakes and Parmesan cheese also go really well with this.  Buon appetito!

Sun-dried tomato chicken sausage and spinach pasta 03


Continue Reading

Creamy Saffron Shrimp & Oven Roasted Asparagus

Creamy Saffron Shrimp 01

First of all, I love seafood!  If it comes from the ocean, I’ll try it.  I recently realized that I don’t make a lot of seafood at home.  I always have some seaweed around and I make a little fish, but that’s about it.  I’m not really sure why but seafood has become more of a restaurant thing.

Last week I was feeling like the protein in our meals was getting repetitive and wanted to switch things up a little.  I was thinking, why in the world have I not made shrimp in like 2 years??  It needed to happen, so here it is!  A light smokey and incredibly flavorful dish that goes great with the oven roasted asparagus.  I’m thinking I may throw in a little extra cayenne pepper next time!

*Makes 3 to 4 servings

Ingredients

1 tsp vegetable oil

1 lb thawed medium or large shrimp

3 cloves garlic, diced

1 tbs arrowroot

1/4 tsp turmeric

pinch of ground saffron or 3 threads

1/2 teaspoon sea salt

cayenne pepper to taste

ground black pepper

1 cup milk of choice

1 Tbs butter or margarine


2 tsp vegetable oil

1 package asparagus (15 to 20)

salt and pepper


Method

In a small mixing bowl, whisk together the milk, arrowroot, salt, pepper, saffron, turmeric, and chili powder.  Set aside.  Heat vegetable oil in a large frying pan.  Add garlic and shrimp and cook on medium/high heat until all the water, if any,  has evaporated.  Reduce to low heat and add butter to the pan.  Allow butter to melt, then slowly stir in milk mixture.  Stir occasionally until the sauce begins to thicken.  Remove from heat.

Creamy Saffron Shrimp 02


Now for the asparagus.  Preheat your oven to 375*F.  Take 2tsp vegetable oil and coat the asparagus on a cookie sheet or oven safe dish. Sprinkle with salt and pepper and pop it in the oven for 10 minutes.  I sometimes add garlic or some other spices depending on what I’m serving it with.  Asparagus makes such a great side!


Continue Reading

Garlic Soy Chicken Glaze

Garlic Soy Glaze 01

We got serious about grilling a few years ago and between the hubby and I, I think we’ve got it covered.  I usually conjure up a marinade or rub and he grills.  With beef or lamb you can get away with putting a rub on it before it goes on the grill, but with chicken I feel like marinating ahead of time is a must.

I tend to forget to marinade the chicken I’m planning on throwing on the grill, and then I have to figure out something else for dinner last minute.  Oops!  So I was very excited to learn that there is such a thing as a glaze.  A glaze only needs to be brushed onto the meat while it’s on the grill, thus there is no need to marinade ahead of time!  I always use this glaze on chicken legs.  It has plenty of flavor and gives the chicken a nice crispy coating that makes biting in even better!

We grill a lot in the summer.  Everything from kabob to sausages, but this Garlic Soy Chicken recipe is a regular on the menu.

Happy grilling!


Ingredients

* Enough for 10 chicken legs

3 Tbs soy sauce

1 tsp honey

1/2 lemon, juiced

1/2 Tbs sesame oil

1/2 Tbs veg oil

2 tsp sea salt

2 Tbs gluten free flour

2 cloves garlic, diced or crushed

3 green onions, chopped

pepper to taste

1 cup water


Method

Place soy sauce and honey in a small mixing bowl and stir together until honey is blended.  Add next 8 ingredients and lightly stir.  Add gluten free flour and stir with a whisk until dissolved, then add water and lightly whisk together.  Believe it or not, that’s it! The trick is to continue to brush the glaze over the chicken while it’s on the grill.

Garlic Soy Glaze


Continue Reading